# Aras Innovator
## Prerequisites
### User Privileges
* Create a user in Aras Innovator that is dedicated for space.vars.SITENAME. The user shouldn't perform any other action from Aras Innovator user interface. Refer to [Add User in Aras Innovator](#add-users) section to learn how to add a new user in Aras Innovator.
* The user identity of the user dedicated for space.vars.SITENAME must have the following permissions for the 'item type' to be integrated:
| **Permission Types** | **Justification** | **Needed When** | **How To** |
| --------------------------- | ------------------------------------------------------------------------------------------------------------------------------------------------------------------------------------------------------------------- | --------------------------------------------------------------------------------------------------------------------------------------------------------------------------------------------------------------------------------------------------------------------------------------------------------------------------------------------------------------------------------------------------------------------------- | --------------------------------------------------------------------------------------------------------------------------------------------------------------------------------------------------------------------- |
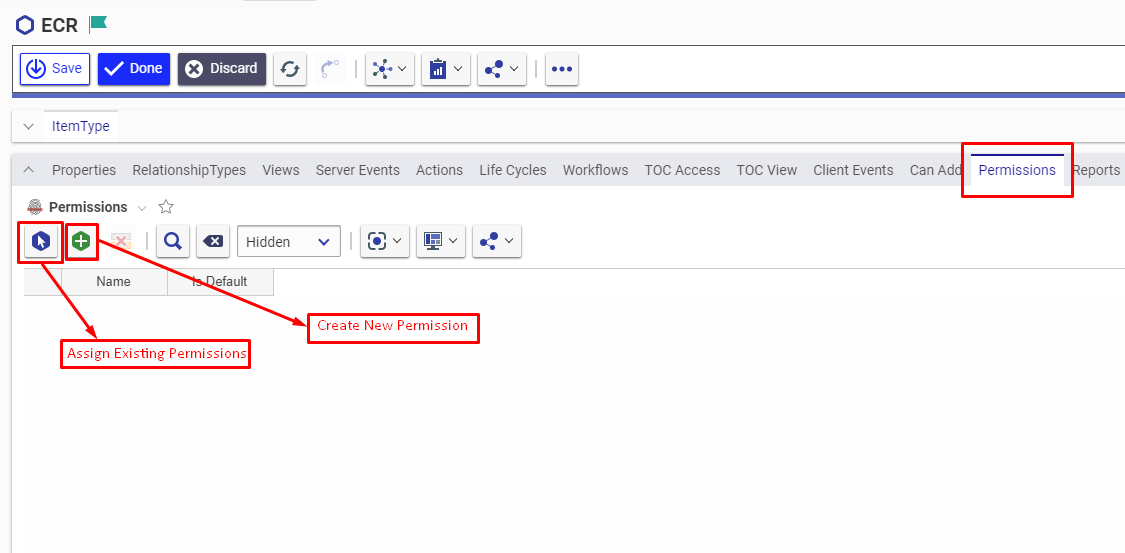
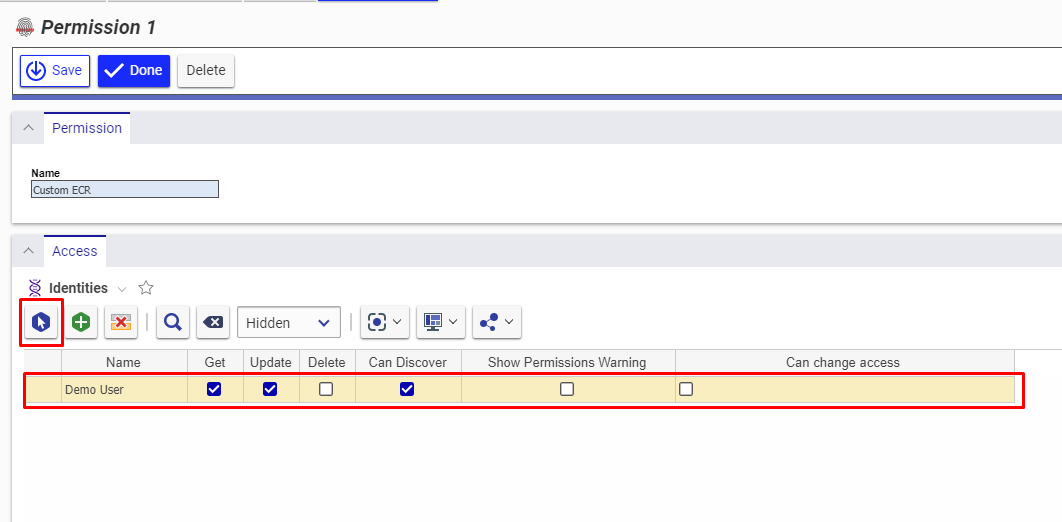
| Get | To get values of each field for particular item of 'item type' to be integrated | Aras Innovator is source system,target system or both. | To learn how to provide user with the Get permission, refer to [Give Necessary Permissions to User for Itemtype](#give-necessary-permissions-to-user-for-itemtype) section. |
| Can Discover | To get the list of items present for a given itemtype. | Aras Innovator is source system,target system or both. | To learn how to provide user with the Can Discover permission, refer to [Give Necessary Permissions to User for Itemtype](#give-necessary-permissions-to-user-for-itemtype) section. |
| Update | To update an item. | Aras Innovator is target system. Also,when Aras Innovator is source system and Update Permission is required for Remote Id or Remote Link configuration in Integration .Please check '''Tracking Id and Link of Entities Across Systems''' section on [Integration Configuration](https://docs.opshub.com/v7.215/integrate/configure-integrations/integration-configuration) page to learn about Remote Id and Remote Link. | To learn how to provide user with the Update permission, refer to [Give Necessary Permissions to User for Itemtype](#give-necessary-permissions-to-user-for-itemtype) section. |
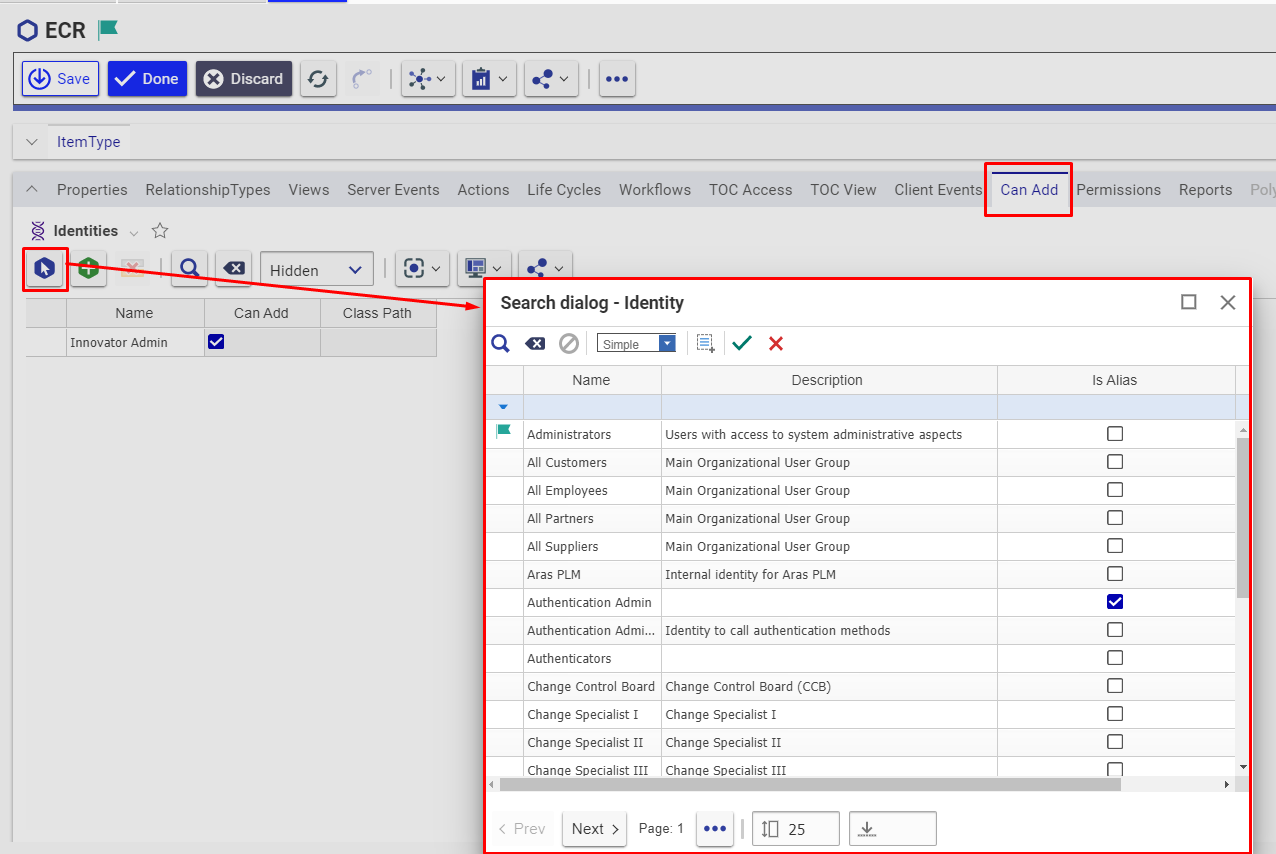
| Can Add | To create an item: The user is allowed to create record from the Aras Innovator System (through the UI and API both) only when the user's identity is allowed in the "Can Add" tab | Aras Innovator is target system. | To learn how to assign "Can Add" permission to user's identity on particular itemtype, refer to [Allow Can Add permission to User](#assign-identity-on-item-type) section. |
| Life Cycle State Transition | To update the state during transition, the role in Life Cycle transition needs to be set as '''Administrators''' for the Integration User \[configured in the space.vars.SITENAME]. | When Aras is the target system. | To learn how to provide user with the Lifecycle State Transition permission, refer to [Assign Life Cycle Transition Permission for Item Type](#assign-life-cycle-state-transition-permissions-for-item-type) section. |
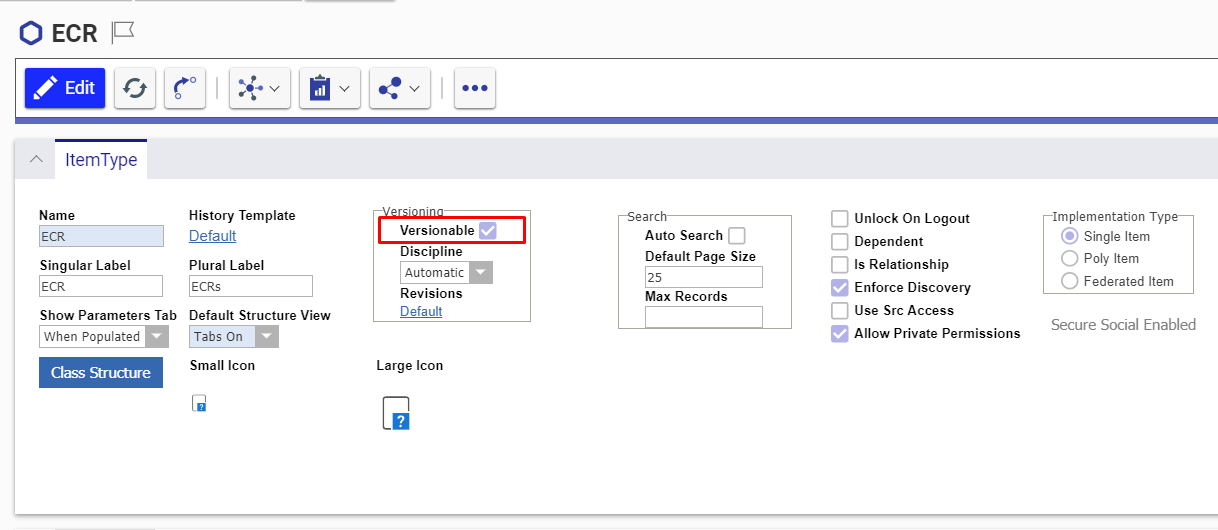
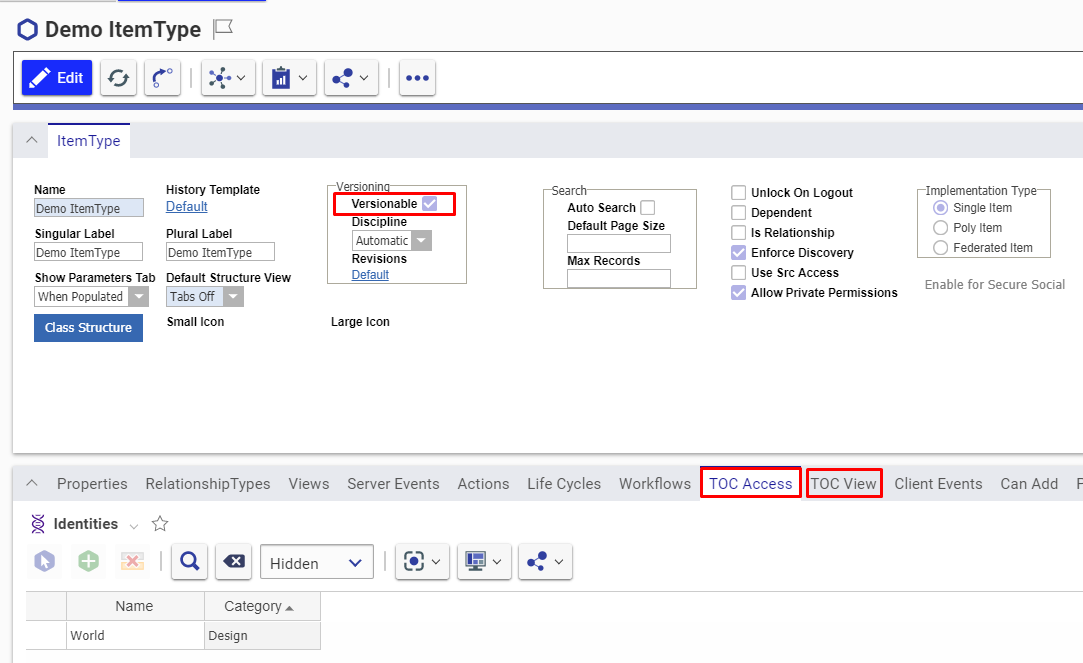
### Versionable Item Type
* For any Item Type in Aras Innovator, the versions/history for the item gets generated only when the item is versionable. Hence for space.vars.SITENAME to synchronize the items with their revisions, they need to be versionable.
* In case they are not versionable, space.vars.SITENAME will synchronize the item as per the current state of that item, available at the time of synchronization. Follow [Make Item Type Versionable](#make-item-type-versionable) in the Appendix section to learn how to make item types versionable.
### Hosting Opshub Aras Service
space.vars.SITENAME requires this service to communicate with Aras Innovator server. It acts as a communication layer between Aras Innovator and space.vars.SITENAME.
#### System Prerequisites
* Configure space.vars.SITENAME Aras Service on a machine that has .NET Framework version 4.7.2 or a higher version installed.
* Please refer to the following [link](https://docs.microsoft.com/en-us/dotnet/framework/get-started/system-requirements) for information on software and hardware requirements for installing .NET Framework 4.7.2.
#### Installation Steps
Follow the steps for installation given below:
1. Locate the path `\Other_Resources\Resources`
2. Extract the `OpsHubArasService.zip` package
3. Check the availability of port 9494 as OpsHubArasService will be using port 9494. Refer to section [Check Availability of Port](#how-to-check-availability-for-port-9494-for-aras-service) to learn how to check if particular port is available. Refer section [How to change the port of service](#how-to-change-the-port-of-service) to learn how to change the default port of service.
4. Open the command prompt with Administrator Privileges and navigate to the folder extracted in Step -2, where the user can find `registerArasService.bat`
5. Now, execute `"registerArasService.bat"`
6. Once the command is executed, go to Windows Services and look for a service with the name `'OpsHubArasService'`.
* Please start the service in case the service has not started yet.
7. Test the web service by opening the URL in browser: `http://:<9494>/ArasService`, for example: `http://localhost:9494/ArasService`
## System Configuration
Before the user continues with the integration, he/she must first configure Aras Innovator System. Refer to [System Configuration](https://docs.opshub.com/v7.215/integrate/configure-integrations/system-configuration) to learn step-by-step process to configure a system. See the screenshot given below for reference:
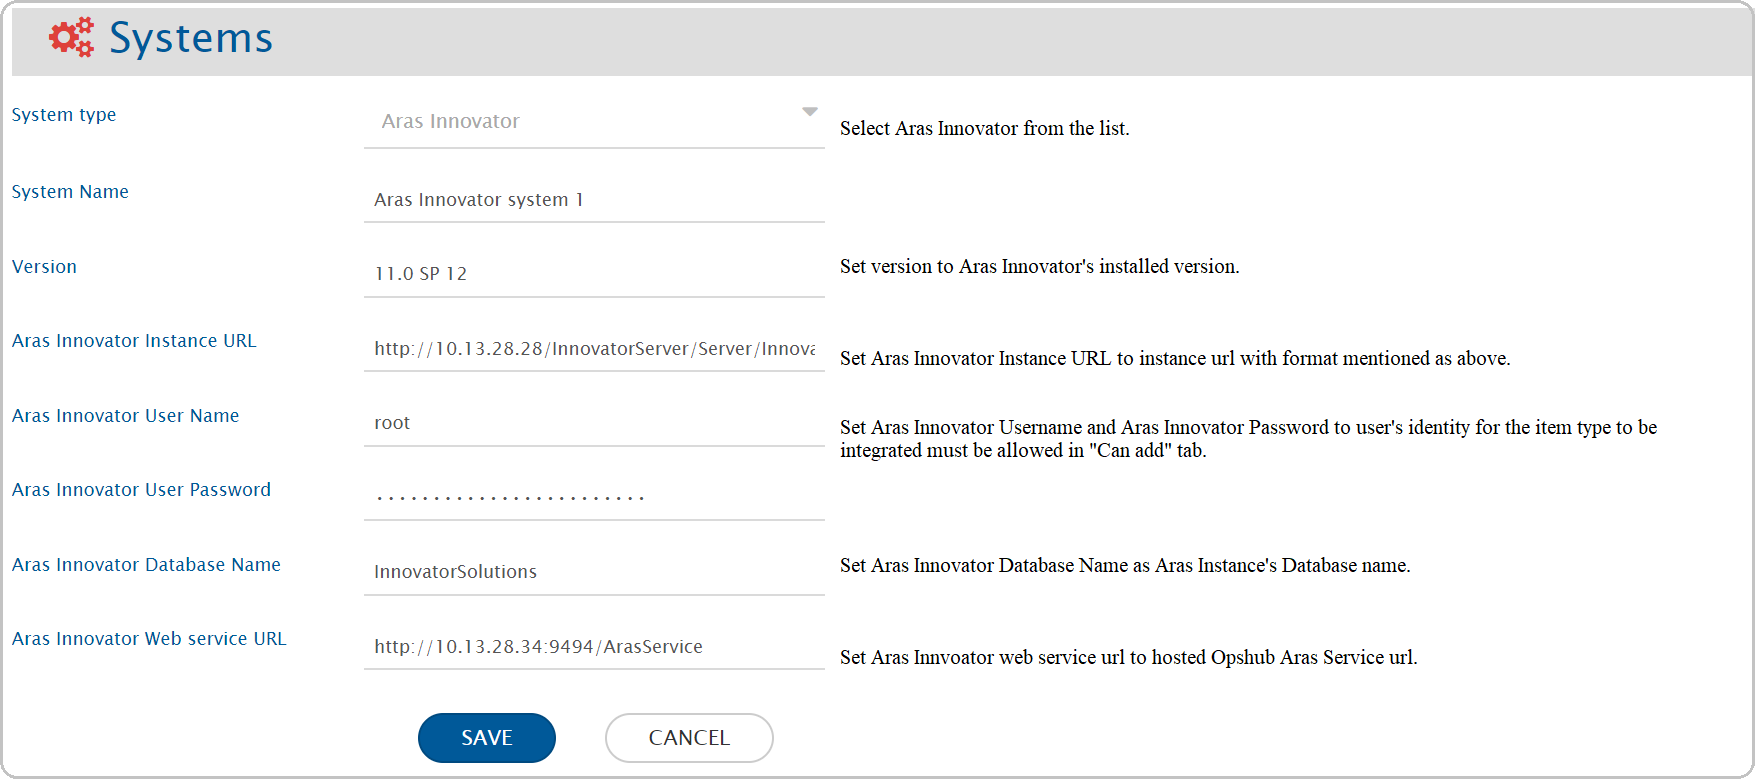
space.vars.SITENAME. Please ensure that user has the necessary permissions. Refer to [User privileges](#user-privileges) for permissions required by user identity. |
| **Aras Innovator User Password** | Provide password of user dedicated for space.vars.SITENAME - use plain text if FIPS is disabled, or MD5-hashed if FIPS is enabled. |
| **Aras Innovator Database name** | Provide Aras Innovator Database name to which the connection needs to be done. Refer to [Get Database Name](#get-database-name) in the Appendix section to learn how to get Database name. |
| **Aras Innovator Web Service URL** | Provide URL for the hosted OpsHubArasService. Refer to [Hosting opshub Aras service](#hosting-opshub-aras-service) to learn how to host space.vars.SITENAME Aras Webservice. |
* If the system is deployed on HTTPS and a self-signed certificate is used, then the user should import the SSL Certificate to be able to access the system from space.vars.SITENAME. Check [Import SSL Certificates](https://docs.opshub.com/v7.215/getting-started/installation/ssl-certificate-configuration) to learn how to import SSL certificate.
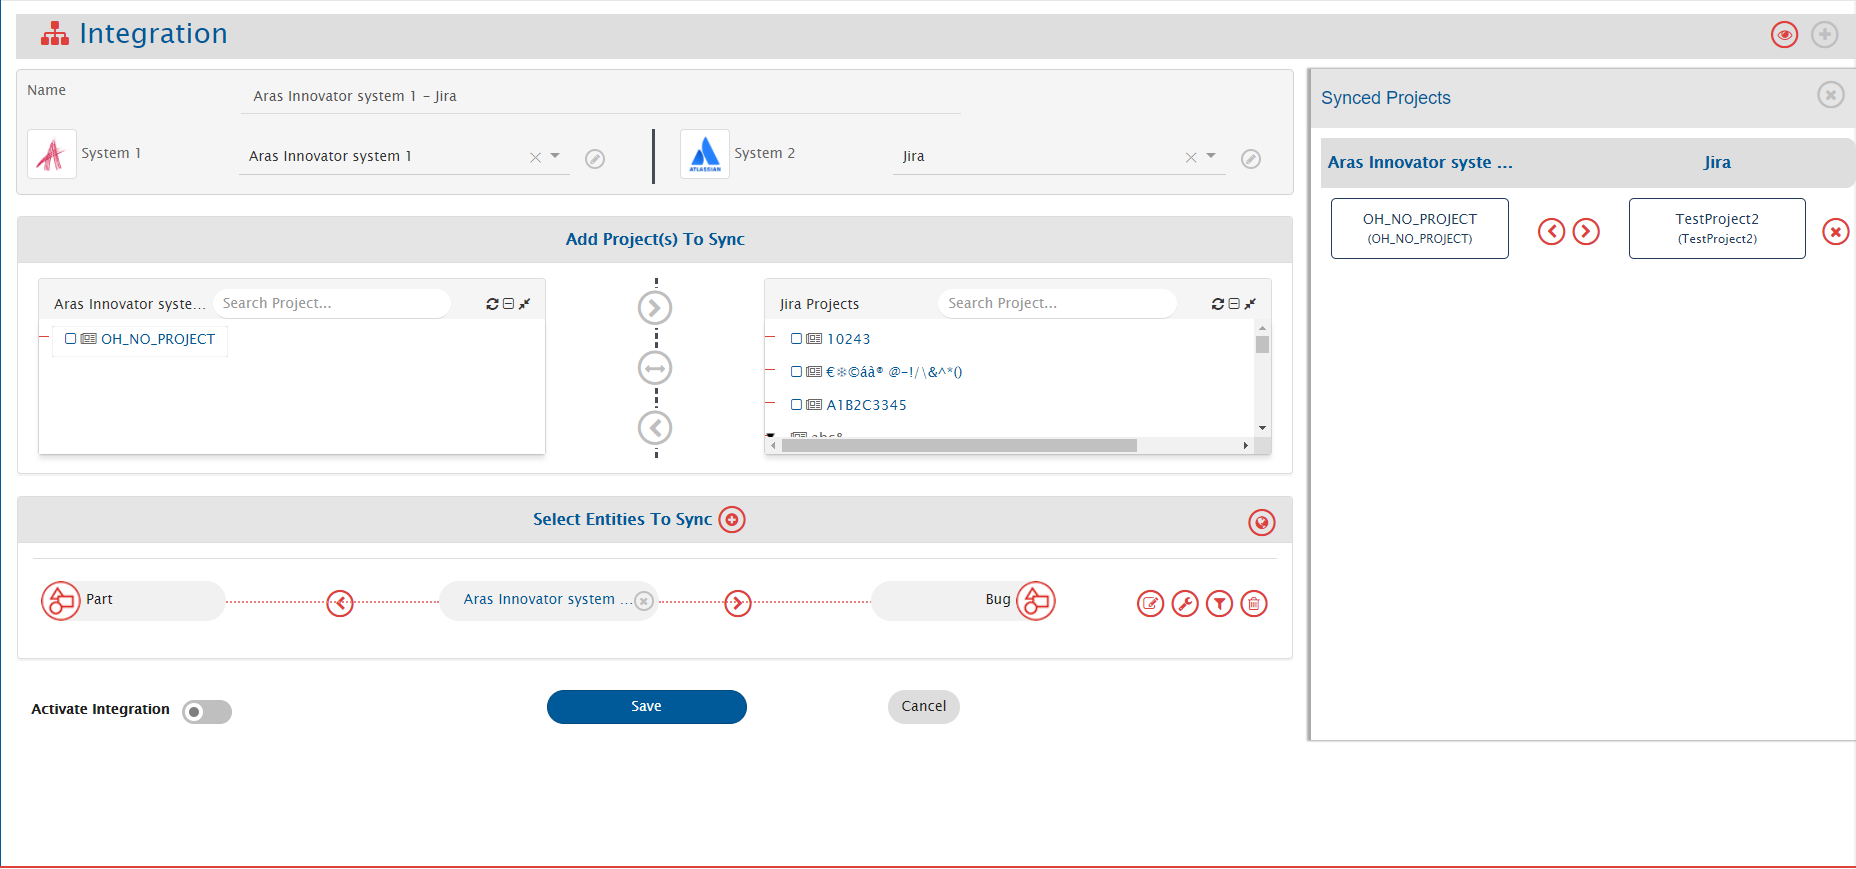
## Mapping Configuration
Map the fields between Aras Innovator and the other system to be integrated to ensure that the data between both the systems synchronize correctly. Check [Mapping Configuration](https://docs.opshub.com/v7.215/integrate/configure-integrations/mapping-configuration) to learn the step-by-step process to configure mapping between the systems.

space.vars.SITENAME will use entity's Internal Id as Remote Id to be synchronized to the other end system.
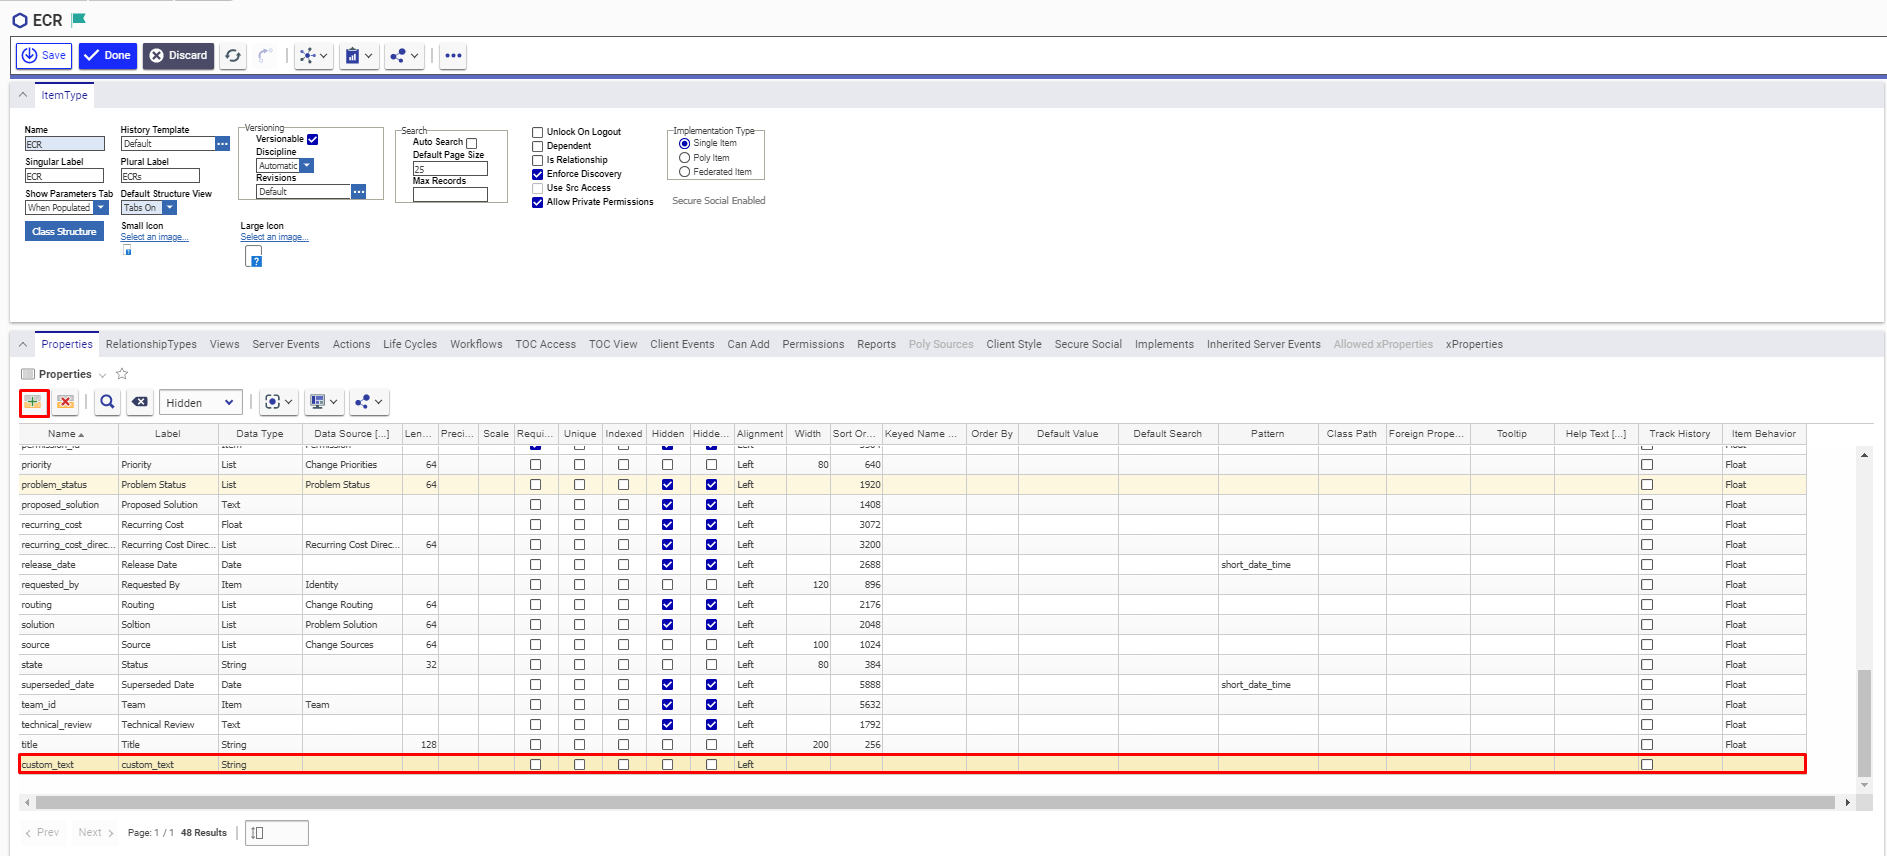
* To show the 'Display Id' as Remote Id, it is required to add the Item Number field in Aras. Refer to [Add Item Number Field](#set-item-number-for-custom-entity) for more details.
## Known Limitations
* Only English alphabets(A-Z,a-z), numeric digits(0-9) and special characters (Example:- :,<,?,>,],\[,!,@ etc.) are supported for Criteria Configuration.
* Attachment as a field is not supported.
* "No Related" Relationship Type is not supported.
* For Aras Innovator as Target System, if the attachment filename contains Windows special characters (/,,",:,\*,?,<,>), then file will not be added in Aras Innovator. As a result, the user will encounter a processing failure. This is because Aras Innovator does not support Windows special characters in filename. Please check [Synchronise file with Windows special characters](https://docs.opshub.com/v7.215/help-center-index/troubleshooting-index/errors-index/aras-error-solutions/oh-aras-1502) to find how to synchronise attachment with Windows special characters in filename.
### Limitations to be Resolved in Upcoming Releases of space.vars.SITENAME
* To synchronise File as Attachment to Itemtype being synchronised, there should be unique relationship type between Itemtype and File.
* Comments with attachments are not supported.
* Synchronisation of Inline image in a Formatted text field is only **supported** for **External Files of Image type**. Inline image synchronisation in Formatted text fields is **not supported** for **Aras Innovator's Internal Images**.
## Appendix
### Add Users
1. Login to the Aras Innovator with user having Administrator Privileges (by default root/admin user has Administrator Privileges).
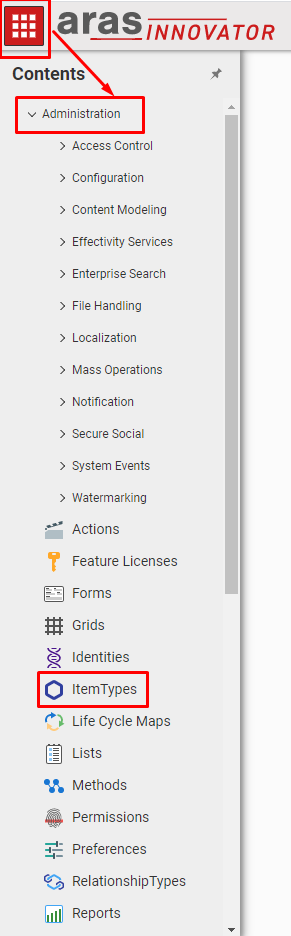
2. Navigate to **Administration → Users → Create New User**. Refer to [Check Administration Tab](#check-administration-tab) to learn where to find Administration tab.
3. Provide necessary details for fields like Login Name, Password, First Name and so on
4. Check the **Logon Enabled** box so that user can login from the UI