space.vars.SITENAME. This user shouldn't perform any other action from Polarion's user interface.
* Following are the user privileges required:
1. The user must have access to the default SVN repository:
* To grant user access to the default repository, refer [Grant Permission To Access Repository](#grant-permission-to-access-repository).
2. The user must have the role of '**project\_admin**' in the project which they are going to configure in space.vars.SITENAME.
* To assign this role, refer [Assign Role To User](#assign-role-to-user).
3. The user must have the following minimal permissions:
| Access Level | READ Permissions | WRITE Permissions |
| ------------------ | ------------------ | -------------------------------------------------------------------------------------------------------------------- |
| Projects | Permission to VIEW | Permission to VIEW |
| REST API Endpoints | Permission to GET | Permission to GET
Permission to PATCH
Permission to POST
Permission to DELETE (For attachments only)
space.vars.SITENAME.
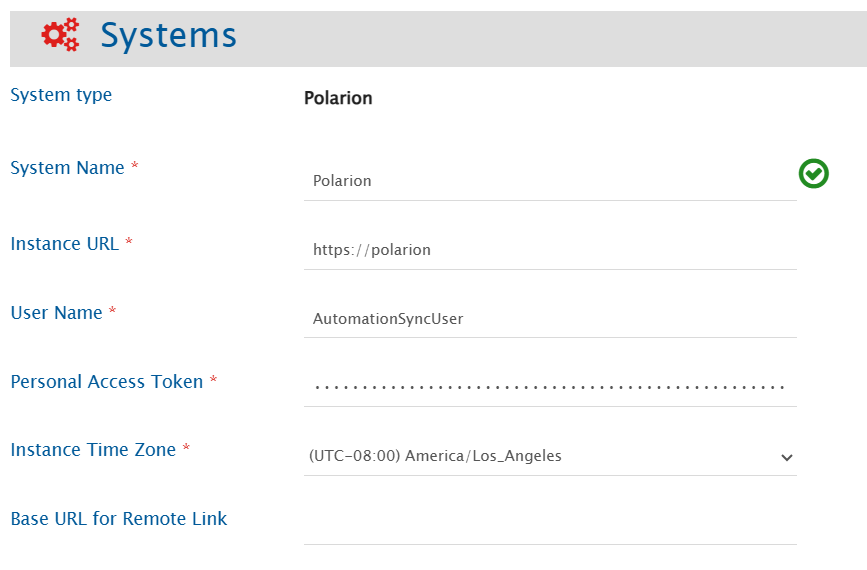
Refer to [System Configuration](https://docs.opshub.com/v7.216/integrate/configure-integrations/system-configuration) for steps on how to configure the system. Refer to the screenshot below:
Provide the Server URL of the Polarion instance.
Format: http\://\[host name]:\[port no] or http\://\[your\_domain\_name].
Example:
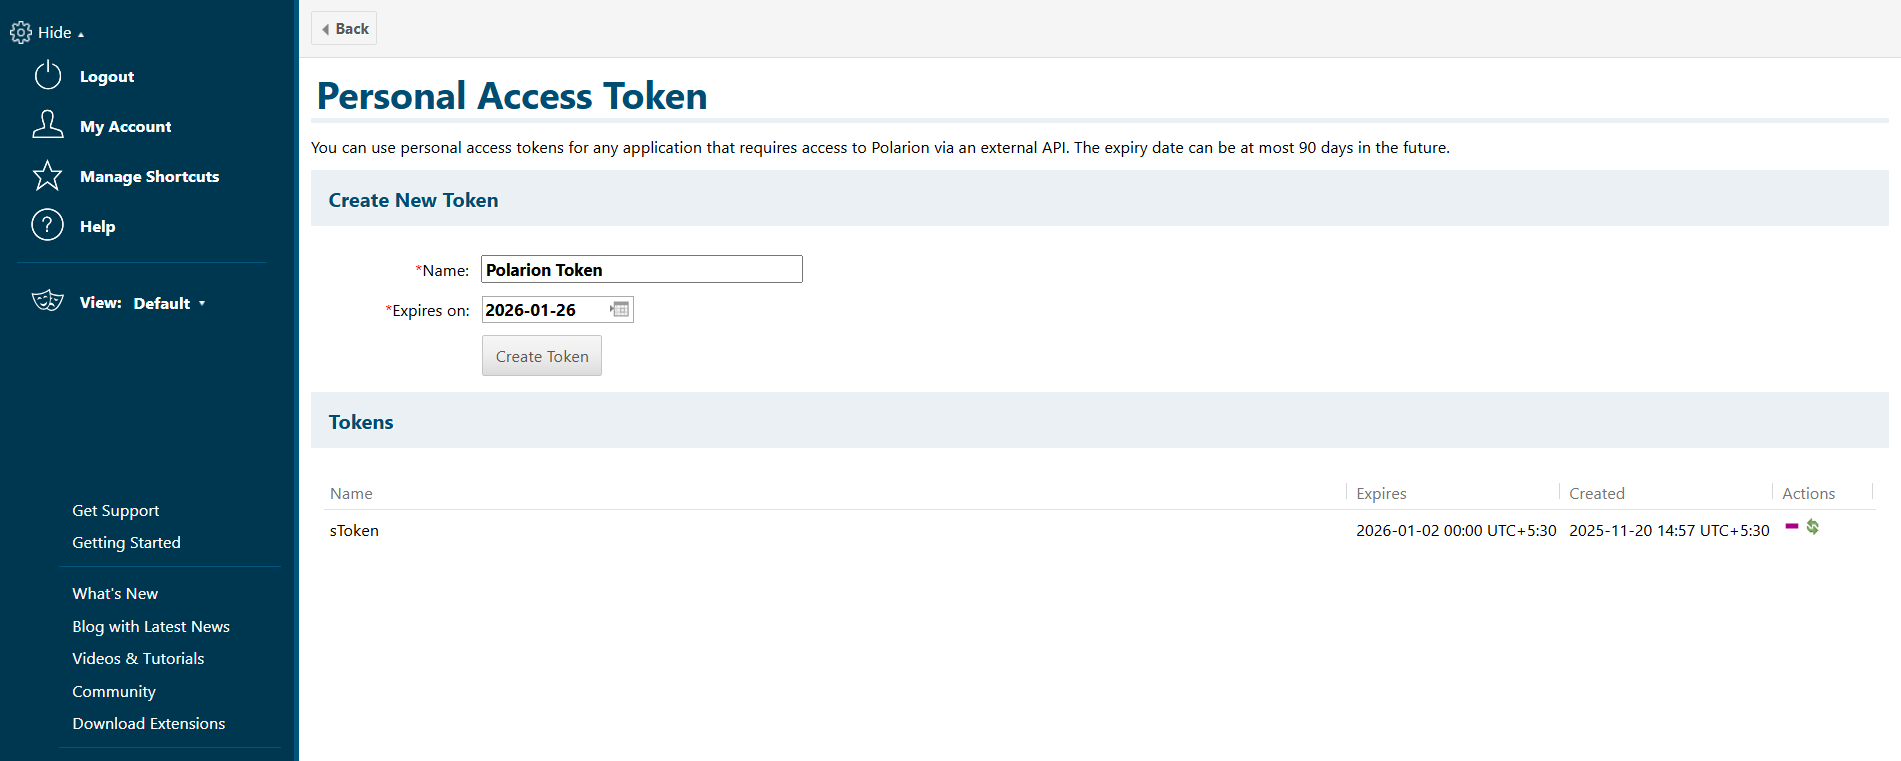
Provide the Personal Access Token for the user specified in the "User Name" field.
Refer to Access API Token section for details.
Provide a different instance URL of the Polarion instance. This URL will be used for generating the Remote Link.
Note: If "Base URL for Remote Link" is empty, it will use default Instance URL to generate remote link if configured on integration.
space.vars.SITENAME:
#### Sample criteria:
| Field name | Field internal name | Criteria description | Criteria snippet |
| ------------ | ------------------- | ------------------------------------------------------ | ------------------------------------- |
| Title | title | Sync items with title containing "API" | (title:\*API\*) |
| Status | status | Sync items where status equals "Open" | (status:open) |
| Created Date | created | Sync items created between 1 June 2025 to 30 June 2025 | (created:\[20250601 TO 20250630]) |
| Status | status | Sync items where status is not reviewed | (NOT status:reviewed) |
| Severity | severity | Sync items where severity is either normal or blocker | (severity:normal OR severity:blocker) |
### Target LookUp Configuration
* Provide query in Target Search Query field such that it is possible to search the entity in the Polarion as the target system. In the target search query field, you can provide a placeholder for the source system's field value in the '@'.
* To learn in detail about how to configure Target LookUp, refer to **Search in Target Before Sync** section on [Integration Configuration](https://docs.opshub.com/v7.216/integrate/configure-integrations/integration-configuration) page.
* Overall, Target LookUp Query is similar to [Criteria configuration](#criteria-configuration), except that the value part contains a field name with '@' instead of static value.
* While adding the query, user needs to add the internal names of the fields on which the query is to be applied.
#### Sample target lookup query:
| Field name | Field internal name | Target Lookup use case | Query snippet |
| -------------- | ------------------- | ------------------------------------------------------------------------------------------- | ------------------------------- |
| Target Item ID | targetItem | Target Lookup on the item having the source entity's id in custom field called 'targetItem' | targetLookup:@oh\_internal\_id@ |
## Known Behaviors and Limitations
* **Comments**:
* Replies to comments or edits in Polarion will be synced as separate comments by space.vars.SITENAME.
* **Project Groups**:
* Project Groups are not visible in the Project mapping list due to API limitations; projects are listed individually.
* **Test cases and Unit test cases in Work item**:
* Test Steps and relation with Test Records are not supported currently.
## Appendix
### Grant Permission To Access Repository
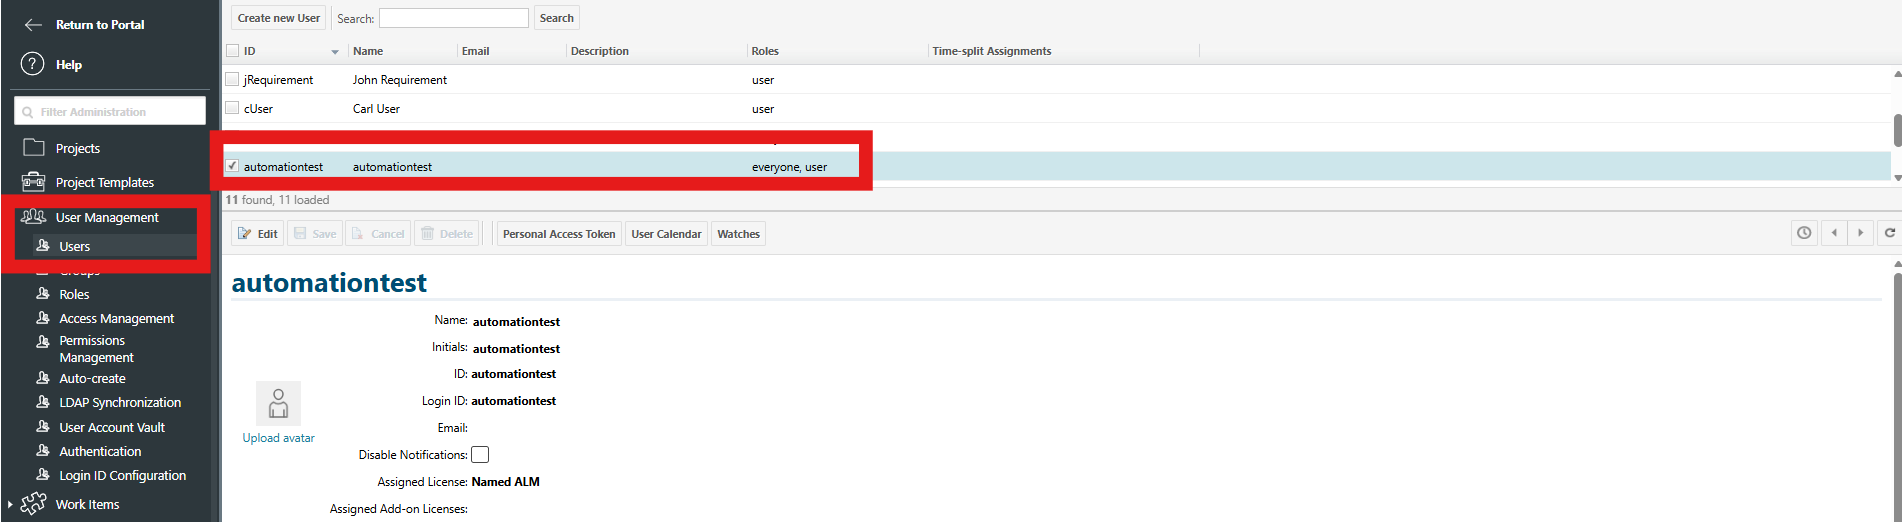
To make sure the user (Example, ID = automationtest) has access to the SVN repository:
* Update the 'access' file located at `@POLARION_INSTALLATION_PATH@\data\svn`, add the following entries:
```ini
# Append automationtest to existing lists
[groups]
user = ..., automationtest
[/]
automationtest = rw
[repo:/]
automationtest = rw
[repo:/.polarion/access]
automationtest = rw
```
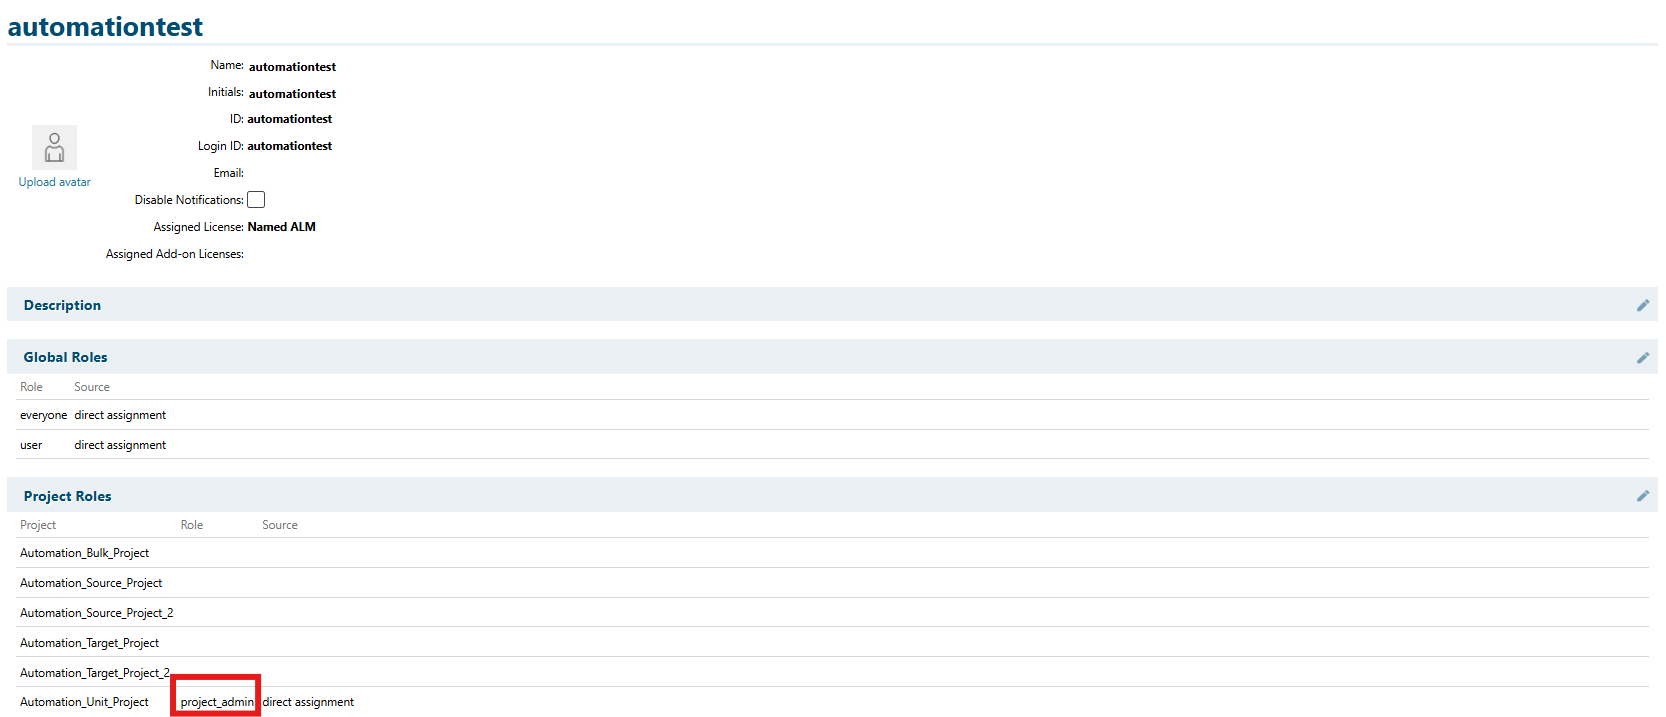
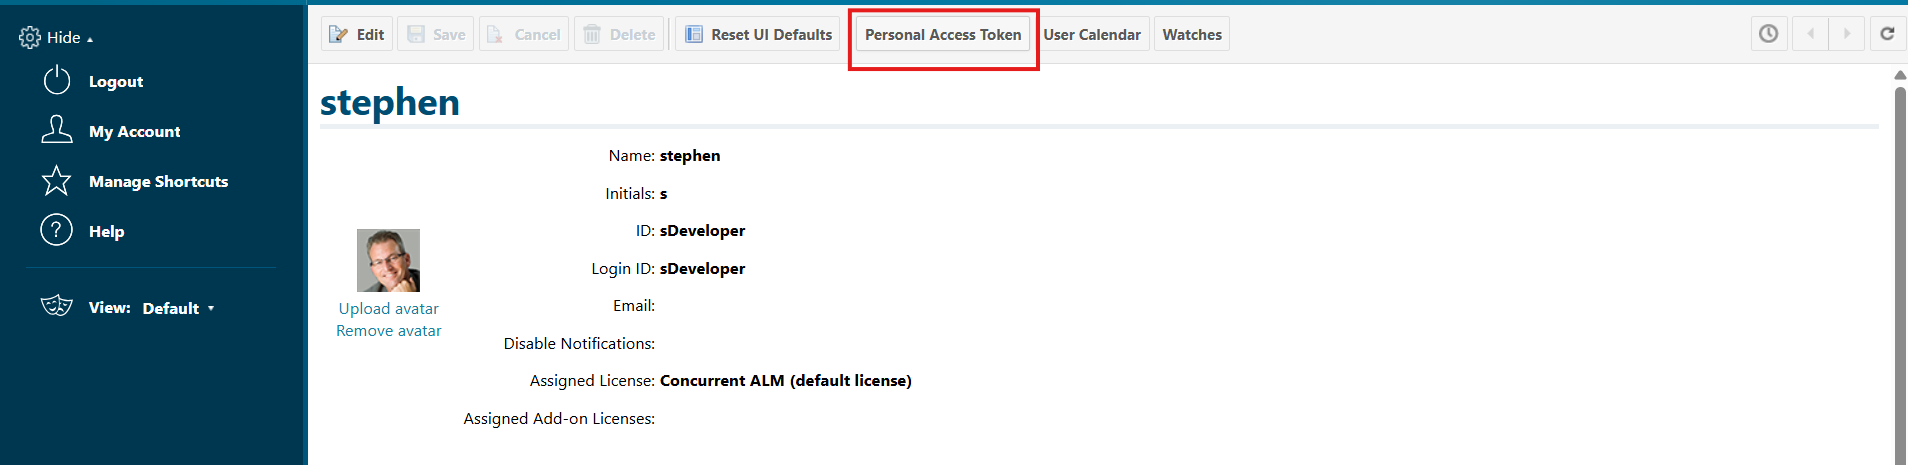
### Assign Role To User
To assign user the role of 'project\_admin':
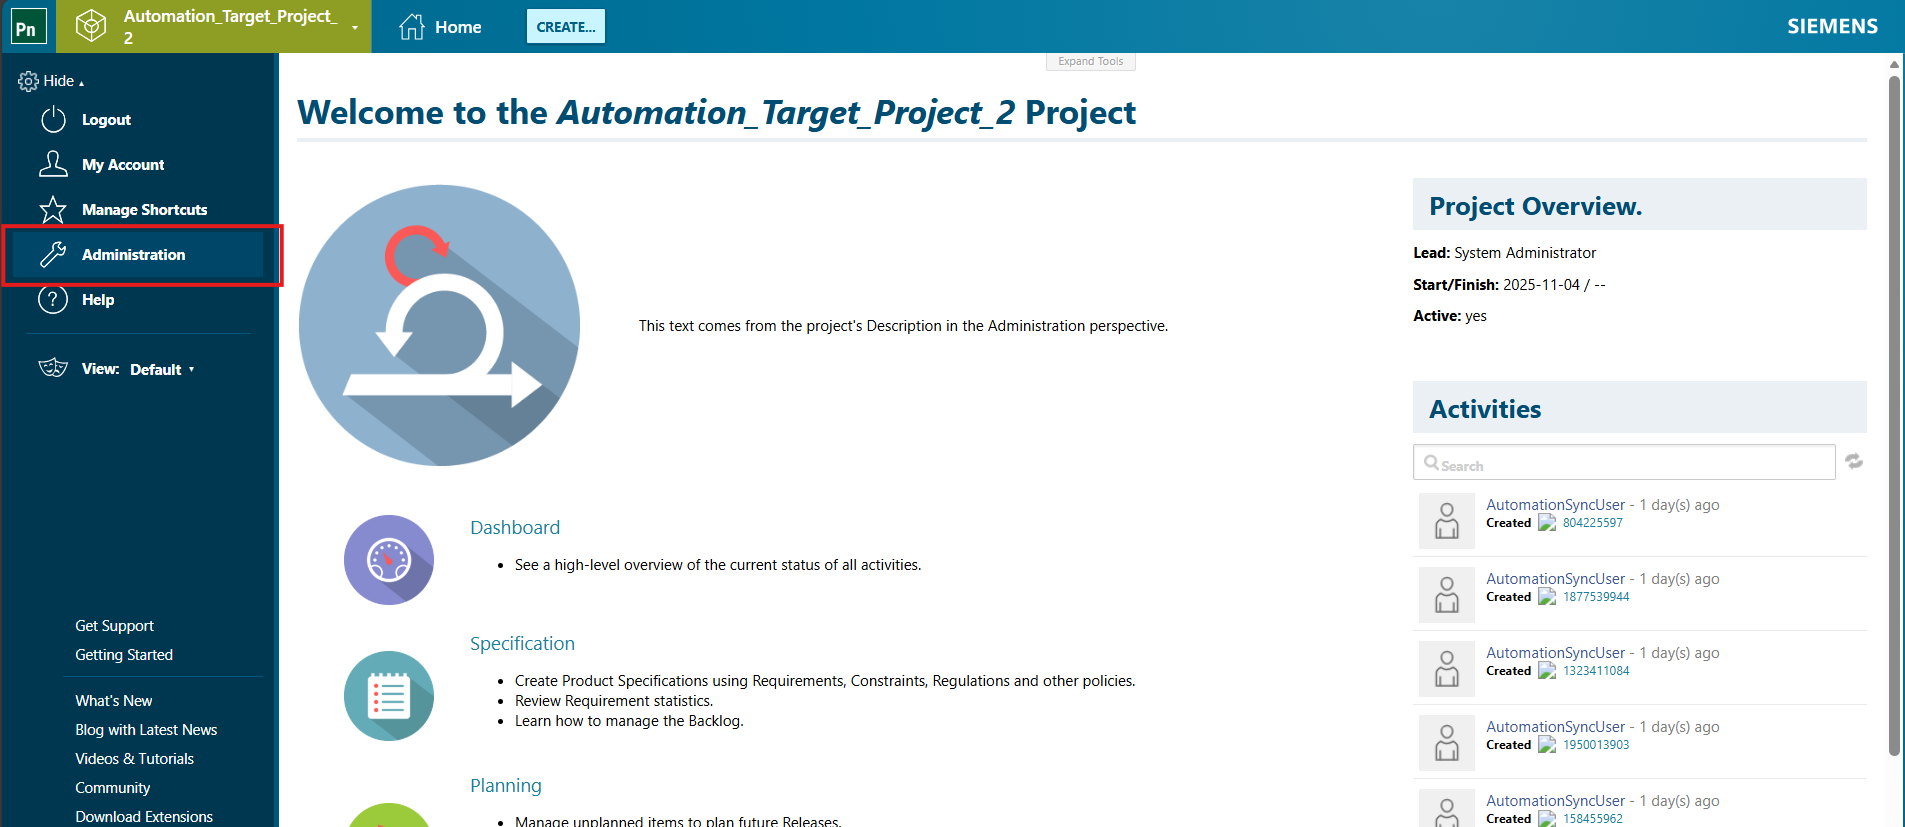
1. Log in to your Polarion account as admin.
2. Go to the 'Administration' section by clicking on the settings icon in the top left-hand corner of your screen. Refer to the screenshot below:


space.vars.SITENAME.
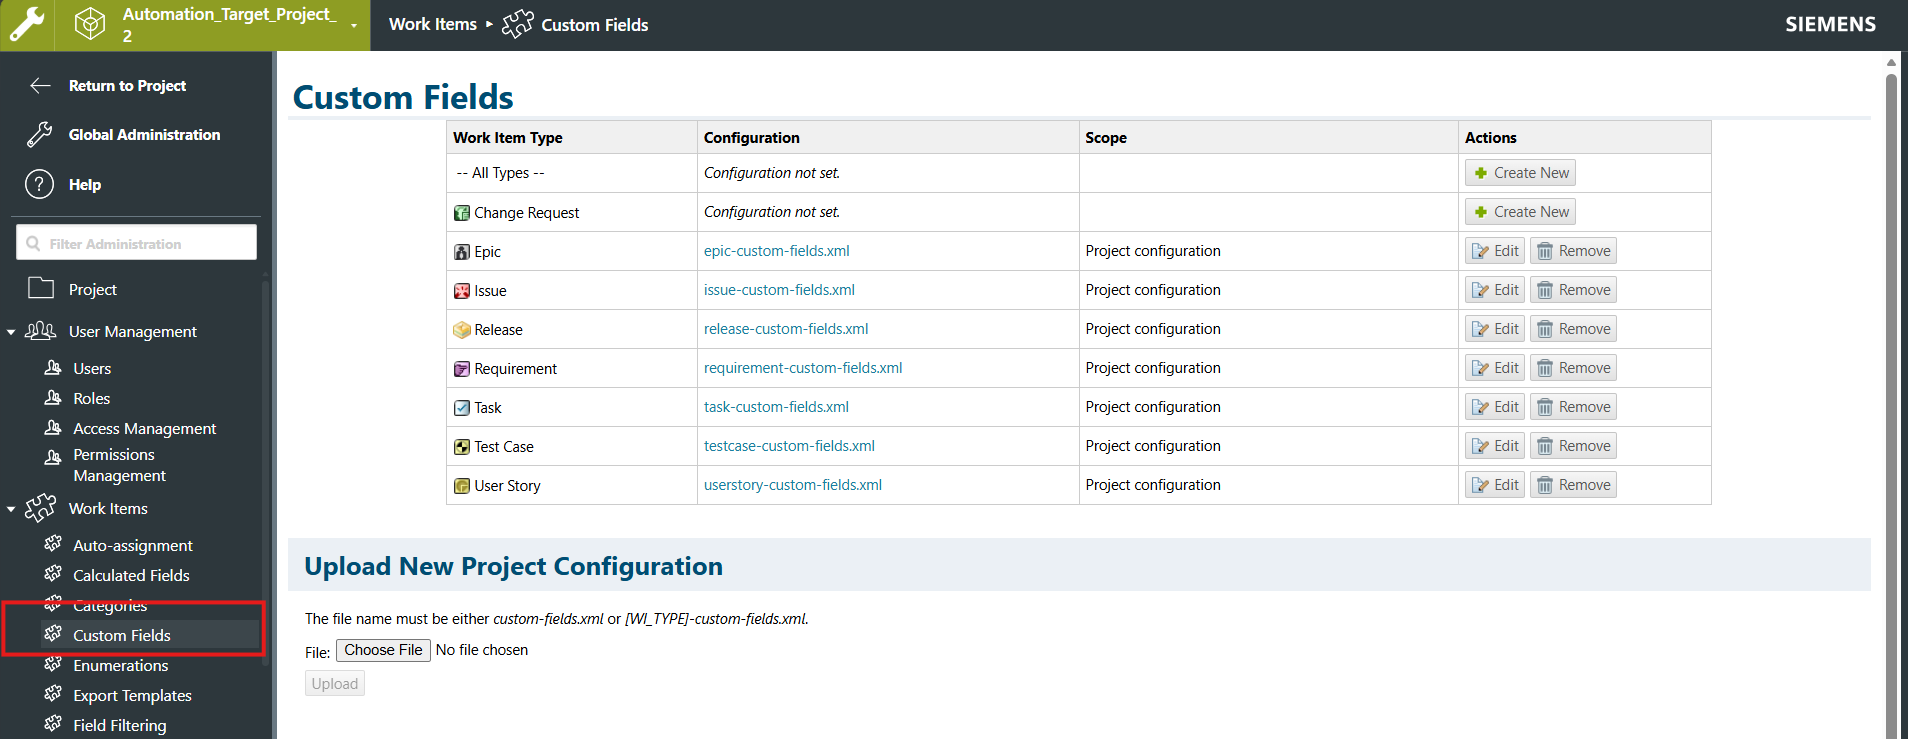
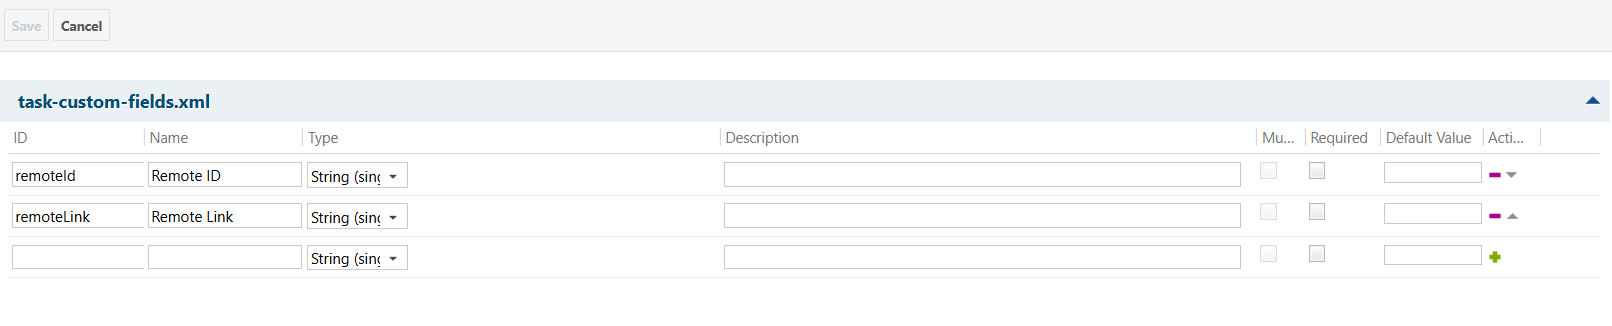
### Access Field Internal Name
To get the field internal names:
1. Log in to your Polarion account.
2. Go to the 'Administration' section by clicking on the settings icon in the top left-hand corner of your screen. Refer to the screenshot below: