# Page Structure & Markdown Formatting Guide

## Creating and Editing Pages in GitBook

### How to Edit an Existing Page

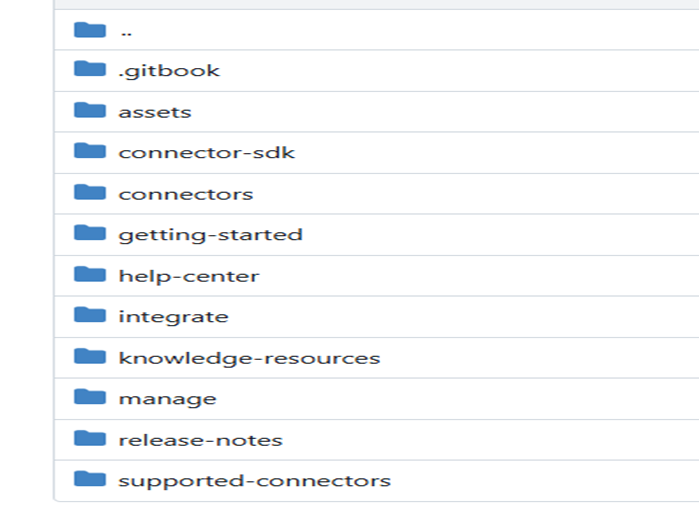
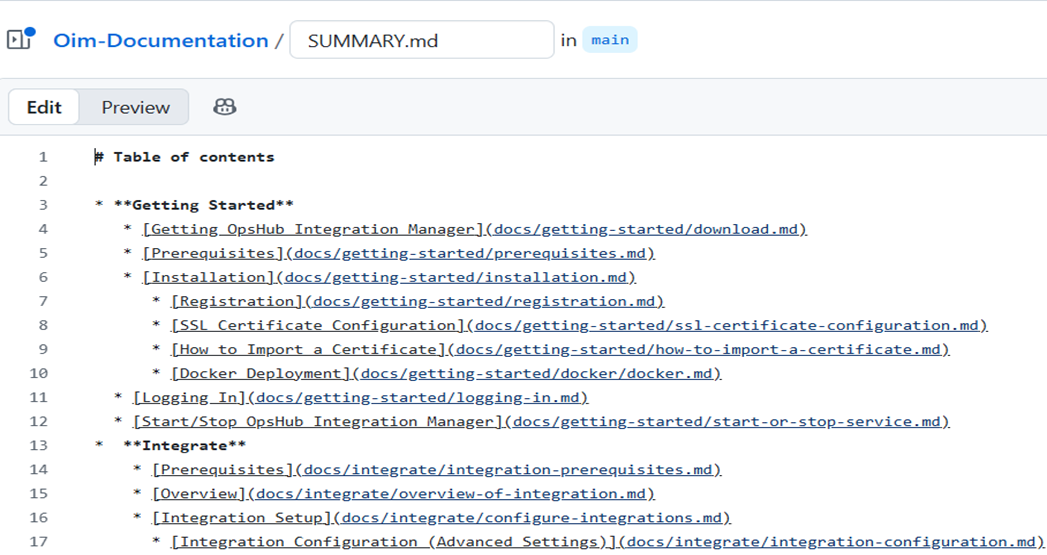
1. Locate the page in the folder hierarchy.

   * Each page in GitBook maps directly to a file in the GitHub repository.

   <div align="center"><img src="https://3739347370-files.gitbook.io/~/files/v0/b/gitbook-x-prod.appspot.com/o/spaces%2F1a8GpUm2lq3lKbytaYjt%2Fuploads%2Fgit-blob-0cf604850c7bfeeac8eb2e90665d74b09bb21909%2Frepo-structure-gitbook.png?alt=media" alt="" width="450"></div>
2. Make required changes (content, formatting, links, images, etc.).
3. Commit the changes.

### When You Add a New Page

{% stepper %}
{% step %}
\### Use the correct file name - Use lowercase letters. - Do not use spaces. - Use dashes (\`-\`) between words. > Example: \`database-configuration.md\`
{% endstep %}

{% step %}
\### Add the page to \`SUMMARY.md\` - GitBook only shows pages listed in \`SUMMARY.md\`. Example: \`\`\`markdown - \[Database Configuration]\(docs/integrate/database-configuration.md) \`\`\`
{% endstep %}

{% step %}

#### Commit both files together

* Make sure that:
  * Your new .md file and the update summary.md file are committed in the same commit.

    <div align="center"><img src="https://3739347370-files.gitbook.io/~/files/v0/b/gitbook-x-prod.appspot.com/o/spaces%2F1a8GpUm2lq3lKbytaYjt%2Fuploads%2Fgit-blob-11f4c8f60e3e02656507be82a92221a8babafaa4%2Fsummary-file.png?alt=media" alt=""></div>

{% endstep %}
{% endstepper %}

\# How to Add a New Connector Entry

To list a new connector in the documentation, follow the steps below. These steps ensure the connector appears correctly in the Connectors list, Supported Connectors table, and the GitBook sidebar.

{% stepper %}
{% step %}
\## Add Connector Documentation Page - Create a new markdown file inside the \`connectors\` folder. > \*\*Example:\*\* connectors/snow-quick-connect.md
{% endstep %}

{% step %}
\## Add Logo in Assets Folder - Place the connector logo in: \`assets/connector/\` directory. - \*\*Logo requirements\*\* - Background color: \`#EDF4FD\` - Background box: \*\*536px × 161px\*\* - Logo size: \*\*72px × 72px\*\* > \*\*Example file:\*\* \`assets/connector/servicenow\.png\`
{% endstep %}

{% step %}
\## Add Entry in \`connectors.md\` - Use the table/card layout format. > \*\*Example:\*\* > \`\`\`html > > **ServiceNow Quick Connect** > ServiceNow Quick Connect > servicenow-quick-connect.md > > \`\`\`
{% endstep %}

{% step %}
\## Add Entry in \`supported-connectors.md\` - Include supported versions and entities in the table format.
{% endstep %}

{% step %}
\## Add Entry in \`SUMMARY.md\` - Include the connector under the Connectors section for sidebar navigation. > \*\*Example:\*\* > \`\`\`markdown > \* \[Connectors]\(connectors/connectors.md) > \* \[ServiceNow Quick Connect]\(docs/connectors/servicenow-quick-connect.md) > \`\`\`
{% endstep %}
{% endstepper %}

\# Markdown Basics - This section provides the essential formatting rules for writing clean, consistent, and well-structured documentation using Markdown. Each topic includes examples, best practices, and recommended usage guidelines to ensure clarity and readability across all content. - For additional reference, you may also review the official formatting guide: \[GitBook Formatting Guide]\(<https://gitbook.com/docs/creating-content/formatting>)

### Headings (Titles and Sections)

* Use the `#` symbol to create headings.
* Each additional # level represents a sub-heading.
* **Example**

  ```markdown
  # H1 – Main Page Heading
  ## H2 – Section Heading
  ### H3 – Subsection Heading
  ```
* **Guidelines**
  * Only H1 and H2 appear in most Table of Contents panels.
  * Do not skip heading levels (use H1 → H2 → H3 in proper order).
  * Keep headings clear and concise.

### Text Styling

| Formatting Type | How to Write It      | Example Output     |
| --------------- | -------------------- | ------------------ |
| **Bold**        | `**Bold text**`      | **Bold text**      |
| *Italic*        | `*Italic text*`      | *Italic text*      |
| Inline Code     | `` `OIM_HOME/bin` `` | `OIM_HOME/bin`     |
| Strikethrough   | `~~Incorrect text~~` | ~~Incorrect text~~ |

### Lists

#### Bullet List

* You can create bullet lists using either \* or -.
* **Example (Using \*)**

  ```markdown
  * First point
  * Second point
  ```

  * **Rendered Output**:

    > * First point
    > * Second point
* **Example (Using -)**

  ```markdown
  - First point
  - Second point
  ```

  * **Rendered Output**:

    > * First point
    > * Second point

#### Numbered List

* Numbered lists use numbers followed by a period:
* **Example**

  ```markdown
  1. Step one
  2. Step two
  3. Step three
  ```
* **Rendered Output**:

> 1. Step one
> 2. Step two
> 3. Step three

### Notes and Warnings

* You can create callout-style messages using blockquotes.
  * **Note Example:**

    ```markdown
    > **Note:** Restart service after configuration. 
    ```

    * **Rendered Output**

      > **Note:** Restart service after configuration.
  * **Warning Example:**

    ```markdown
    > **Warning:** Do not delete this folder. 
    ```

    * **Rendered Output**

      > **Warning:** Do not delete this folder.

### Angle Brackets `<` and `>`

| Purpose            | How to Write It                  | Correct Output |
| ------------------ | -------------------------------- | -------------- |
| Escape `<` and `>` | `&lt;tag&gt;` instead of `<tag>` | `<tag>`        |

### Code Blocks (Multiple Lines)

* Use triple backticks to create multi-line code blocks.
* You can also specify the language to enable syntax highlighting.
* **JSON Example (How to Write It)**

  ````
      ```json
      {
        "name": "OpsHub",
        "version": "1.0"
      }
      ```
  ````

  * **Rendered Output**

    ```json
    {
      "name": "OpsHub",
      "version": "1.0"
    }
    ```
* **XML Example (How to Write It)**

  ````
      ```xml
      <configuration>
        <setting key="timeout">30</setting>
      </configuration>
      ```
  ````

  * **Rendered Output**

    ```xml
    <configuration>
    <setting key="timeout">30</setting>
    </configuration>
    ```
* **Bash Example (How to write It)**

  ````
      ```bash
      echo "Hello, OpsHub"
      ``` 
  ````

  * **Rendered Output**

    ```bash
    echo "Hello, OpsHub"
    ```

## Images

* Store all images inside the `docs/assets` directory.
* Any project should reference images from this central folder.

### Image Reference Syntax

#### Basic Image

* **Syntax:**

  ```markdown
  ![](../assets/image-name.png)
  ```
* **Rendered Output**

  ![](https://3739347370-files.gitbook.io/~/files/v0/b/gitbook-x-prod.appspot.com/o/spaces%2F1a8GpUm2lq3lKbytaYjt%2Fuploads%2Fgit-blob-a5d97ae6aaaa61434b93fb36a7f0b46419789f9d%2Fsample.jpg?alt=media)

#### Centered Image

* **Syntax:**

  ```html
  <p align="center">
  <img src="../assets/image-name.png" width="500">
  </p>
  ```
* **Rendered Output**

  <div align="center"><img src="https://3739347370-files.gitbook.io/~/files/v0/b/gitbook-x-prod.appspot.com/o/spaces%2F1a8GpUm2lq3lKbytaYjt%2Fuploads%2Fgit-blob-a5d97ae6aaaa61434b93fb36a7f0b46419789f9d%2Fsample.jpg?alt=media" alt="" width="400"></div>

### Image Naming Rules

* Avoid spaces in file names.
* Use lowercase for consistency.
* Use dashes (-) or underscores (\_).

### Image Path Guidelines

| Page Location                                     | Correct File Path    | Markdown Example                               |
| ------------------------------------------------- | -------------------- | ---------------------------------------------- |
| integrate/advanced-scenario/source-delete-sync.md | `../../assets/x.png` | `![Source Delete Example](../../assets/x.png)` |
| help-center/error.md                              | `../assets/x.png`    | `![Error Handling](../assets/x.png)`           |

## Embedding Videos

* You can embed videos directly into documentation pages using the `{% embed %}` tag.
* **YouTube Embed Example**

  ```
  {% embed url="https://youtu.be/Po6K9_UXrfM" %}
  ```
* **Video Storage Rules**
  * Video files cannot be uploaded directly into the repository.
  * To include video content, follow these guidelines:
    * Upload all videos to YouTube.
    * Ensure the video is publicly visible.
    * Use the `embed` tag to insert the video link into your documentation pages.

## Reusable Content

* Reusable content allows you to maintain common text (such as repeated instructions or configuration notes) in a single location and include it across multiple pages.
* This helps ensure consistency, easy maintenance, and automatic updates whenever the shared content changes.
* All reusable Markdown files should be stored inside: `.gitbook/includes`.
* **How to Include a Reusable File:**

  * Use the `{% include %}` tag to pull shared content into any page.\
    Example:

  ```
  {% include "../.gitbook/includes/windows-specific-configuration.md" %}
  ```
* **Notes:**
  * Any change in the included file updates all pages automatically.
  * GitBook does not create a TOC (index) for included files.
  * If indexing is required, split content into smaller include files.

## Links

| Type     | Example                                      |
| -------- | -------------------------------------------- |
| Internal | `[Integration Setup](../integrate/setup.md)` |
| External | `[OpsHub Website](https://www.opshub.com)`   |
| Anchor   | `[Go to Configuration](#configuration)`      |

## Tables

### Markdown Table

* Markdown supports simple, clean tables for organizing structured information.
* **Basic Syntax**

  * Use | (pipe characters) to define columns and - (dashes) to separate the header row:

  ```markdown
  | Column 1 | Column 2   | Column 3 |
  |----------|:----------:|---------:|
  | Value 1  | Value 2    | Value 3  |
  ```

  * **Rendered Output**

    | Column 1 | Column 2 | Column 3 |
    | -------- | :------: | -------: |
    | Value 1  |  Value 2 |  Value 3 |
* **Notes:**
  * All rows must have the same number of columns.
  * Alignment is optional and can be added using colons (:).

### Card View HTML Table

* You can use cards to create a visually engaging page layout, combining text, links, and optional images in a clean, grid-based structure.
* **Example:**

  ```html
  <table data-view="cards" data-full-width="false">
    <thead>
      <tr>
        <th align="center" data-card-cover></th>
        <th data-hidden data-card-target data-type="content-ref"></th>
      </tr>
    </thead>
    <tbody>
      <tr>
        <td align="center"><strong>Welcome to OpsHub Guide</strong></td>
        <td><a href="../../README.md">Welcome</a></td>
      </tr>
    </tbody>
  </table>
  ```
* **Rendered Output:**

  <table data-view="cards" data-full-width="false"><thead><tr><th align="center"></th><th data-hidden data-card-target data-type="content-ref"></th></tr></thead><tbody><tr><td align="center"><strong>Welcome to OpsHub Guide</strong></td><td><a href="../readme">readme</a></td></tr></tbody></table>

## Conditional Blocks

* Conditional blocks allow you to show or hide content depending on selected product variables (e.g., OIM vs OM4ADO).

  > **Example:** Show content only when SITENAME = "OpsHub Integration Manager":
  >
  > ```
  > {% if "OpsHub Integration Manager" === space.vars.SITENAME %}
  > ... content
  > {% endif %}
  > ```

### Variable File (`vars.yaml`)

* Variables are defined inside: `.gitbook/vars.yaml`
* These variables allow GitBook to automatically render variable's value across all documentation.

  > **Example** (vars.yaml):
  >
  > ```yaml
  > SITENAME: "OpsHub Integration Manager"
  > ```

### Usage

* To insert the value of a variable inside your documentation:

  > ```html
  > <code class="expression">space.vars.SITENAME</code>
  > ```
* **Rendered Output:**

  > ```
  > This site describes <code class="expression">space.vars.SITENAME</code> features.
  > ```

  (This replaces the variable with its actual value.)
