# Trac
## Prerequisites
### Trac Configuration
In Trac, we need to install xmlrpc plugin. Then we need to enable that in the `trac.ini` file located in `Trac project/conf` folder.
```
[Components]
tracrpc.* = enable
```
### User Privileges
* Create one user of Trac, dedicated to space.vars.SITENAME. User should not be used to do any operations from System's User-Interface.
* User must have all privileges to call its web-service and permissions to read, write, and edit the entity.
* Following are the privileges required in Trac for the user of space.vars.SITENAME.
* TICKET\_ADMIN
* XML\_RPC
For privilege management, please refer appendix [User Privileges](#user-privileges).
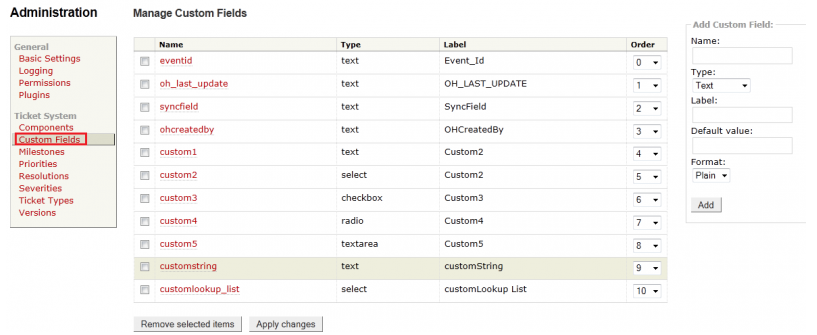
### Custom Fields Configuration
In Trac, following custom fields are required. For creating custom fields, please refer appendix [Custom Field Configuration](#custom-field-configuration).
| **Name** | **Type** | **Label Name** |
| ----------- | -------- | --------------- |
| ohcreatedby | text | OH\_CREATED\_BY |
## System Configuration
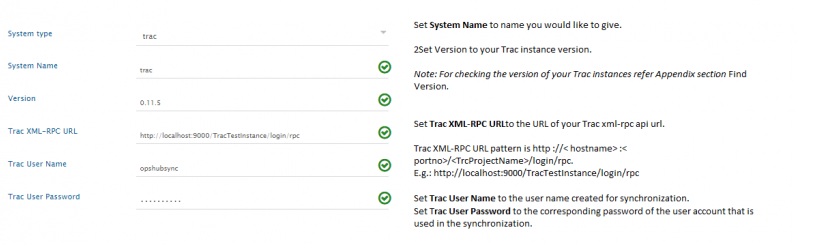
Before you continue to the integration, you must first configure Trac.
Click [System Configuration](https://docs.opshub.com/v7.219/integrate/configure-integrations/system-configuration) to learn the step-by-step process to configure a system.
Refer the screenshot given below for reference.
If the system is deployed on HTTPS and a self-signed certificate is used, then you will have to import the SSL Certificate to be able to access the system from space.vars.SITENAME. Click [Import SSL Certificates](https://docs.opshub.com/v7.219/getting-started/installation/ssl-certificate-configuration) to learn how to import SSL certificate.
## Mapping Configuration
Map the fields between Trac and the other system to be integrated to ensure that the data between both the systems synchronizes correctly.
Click [Mapping Configuration](https://docs.opshub.com/v7.219/integrate/configure-integrations/mapping-configuration) to learn the step-by-step process to configure mapping between the systems.
## Integration Configuration
Set a time to synchronize data between Trac and the other system to be integrated. Also, define parameters and conditions, if any, for integration.
Click [Integration Configuration](https://docs.opshub.com/v7.219/integrate/configure-integrations/integration-configuration) to learn the step-by-step process to configure integration between two systems.
## Criteria Configuration
### Query
Query in Track system is valid for any filed available in trac as follows:\
``
Please note, all the query string should be in small letters.
### Sample Query
```
status!=closed or status!=open
priority!=must or priority!=major
reporter=xyz
```
## Appendix
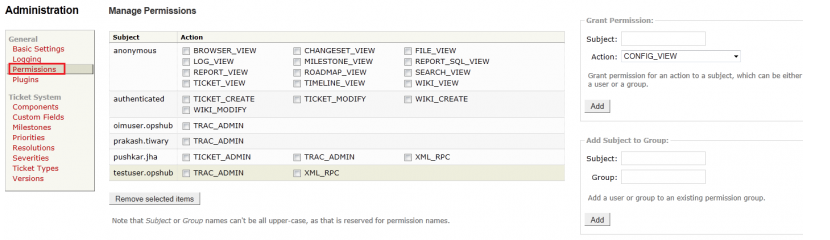
### User Privileges
* In **Admin** tab, select **Permission** from the left panel.
* In **Subject** of **Grant Permission** option named the resource to which you want to give privilege. For Example, 'oimuser'.
* In **Action** of **Grant Permission** options, select the permission you want to give to the selected Subject. For Example, 'XML\_RPC'.
* Click **Add** to give the permission.