# FogBugz
## Prerequisites
### User privileges
* Create one user of FogBugz of type 'Normal' and set User Time Zone, dedicated to space.vars.SITENAME. User should do any operations from FogBugz's user interface.
* For adding user and setting time zone in FogBugz, refer [Add User](#add-user) section in appendix.
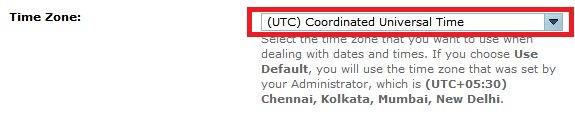
* Ensure the user's time zone is set to UTC (also known as Coordinated Universal Time). Refer [Set User Time Zone](#set-user-time-zone) for details.
* If you are not using SAAS instance of FogBugz, you might need to import SSL certificate to the server. To know how to import certificate, refer [Import HTTPS Certificate To Server](https://docs.opshub.com/v7.220/getting-started/installation/ssl-certificate-configuration) page.
## System Configuration
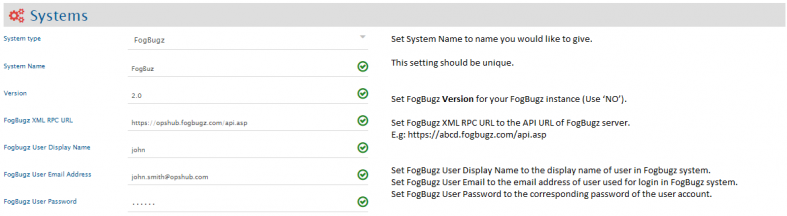
Before you continue to the integration, you must first configure FogBugz. Click [System Configuration](https://docs.opshub.com/v7.220/integrate/configure-integrations/system-configuration) to learn the step-by-step process to configure a system.\
Refer the screenshot given below for reference.
For checking version and api\_key, refer [How to get API URL and Version?](#how-to-get-api-url-and-version) section in appendix.
If the system is deployed on HTTPS and a self-signed certificate is used, then you will have to import the SSL Certificate to be able to access the system from space.vars.SITENAME. Click [Import SSL Certificates](https://docs.opshub.com/v7.220/getting-started/installation/ssl-certificate-configuration) to learn how to import SSL certificate.
## Mapping Configuration
Map the fields between FogBugz and the other system to be integrated to ensure that the data between both the systems synchronizes correctly.\
Click [Mapping Configuration](https://docs.opshub.com/v7.220/integrate/configure-integrations/mapping-configuration) to learn the step-by-step process to configure mapping between the systems.
### Integration Configuration
In this step, set a time to synchronize data between FogBugz and the other system to be integrated. Also, define parameters and conditions, if any, for integration.\
Click [Integration Configuration](https://docs.opshub.com/v7.220/integrate/configure-integrations/integration-configuration) to learn the step-by-step process to configure integration between two systems.
### Criteria Configuration
**For System Fields**:
* Refer and navigate to 'Axes for searching cases'. Now, find the name of the field on which you want to configure the criteria.
* Put the name of the field, then put a colon (:) and the value of that field, for example `Status:Active`.
**For Custom Fields**:
* Refer and navigate to 'Searching Custom Fields'.
* For Custom Field and CustomValue, query should start with the custom field's name followed by a colon and the custom value, for example `CustomxField: "CustomValue"`.
Click [Create Custom Fields](#create-custom-fields) to learn how to create custom fields.
## Appendix
### Add user
* Login to FogBugz server.
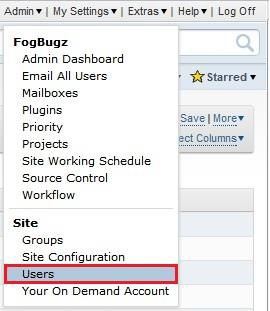
* Click on **Admin** on the right top corner and select **Users**.
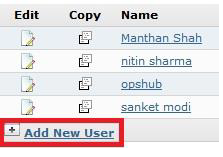
* Click on **Add New User Account**.
* Click on **Add New User Account.**
### Set User Time Zone
* Log into **FogBugz** server.
* Click **Admin** tab on the top-right corner and select **Users**.
* Select the user from the user list. Click **Edit**.
* Set Time Zone to: **(UTC) Coordinated Universal Time**.
### Create Custom Fields
* Login to FogBugz server.
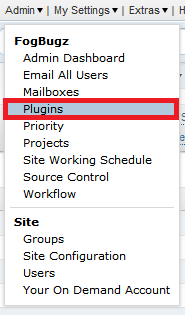
* Click on **Admin** menu.
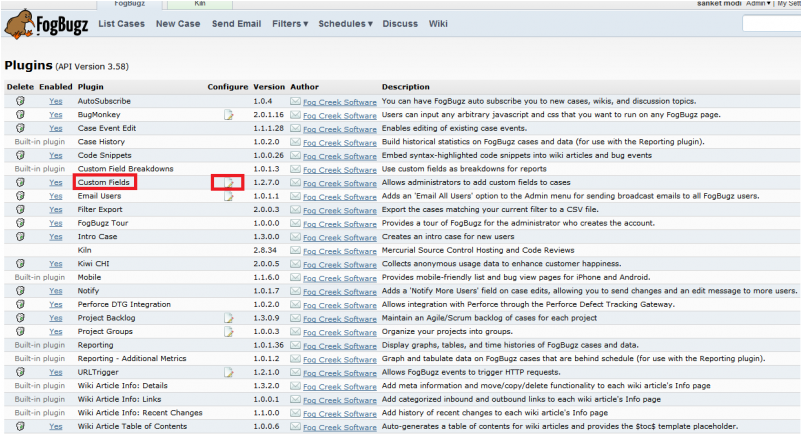
* Select **Plugins** from menu.
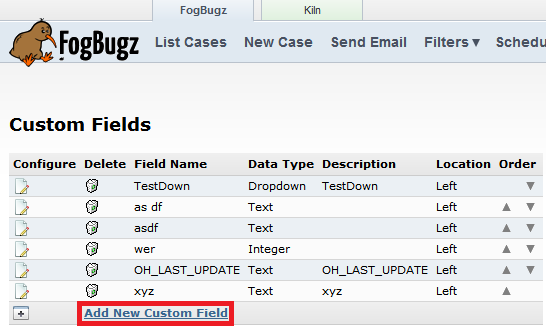
* Check if Custom Fields is enabled, if it is enabled, click on 'edit' symbol.
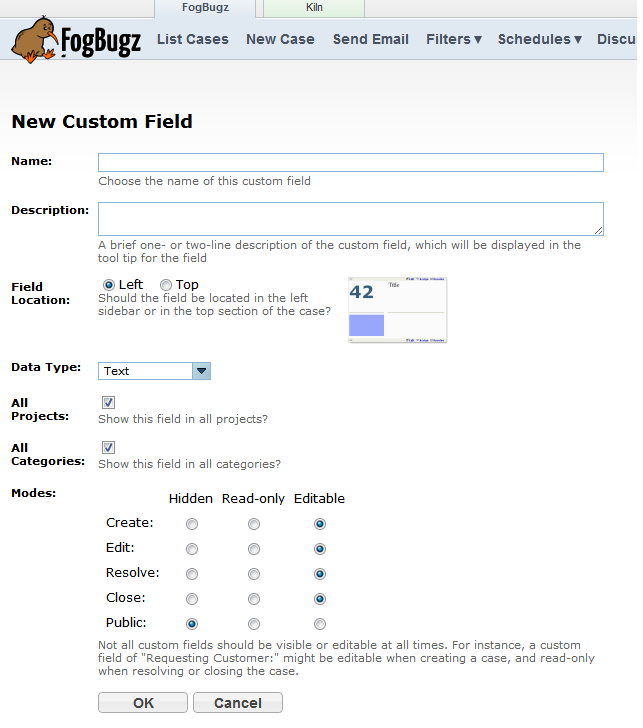
* Click **Add New Custom Field**.
### How to get API URL and Version?
Go to and see **Checking the API version and location**.
---
# Agent Instructions: Querying This Documentation
If you need additional information that is not directly available in this page, you can query the documentation dynamically by asking a question.
Perform an HTTP GET request on the current page URL with the `ask` query parameter:
```
GET https://docs.opshub.com/v7.220/connectors/fogbuz.md?ask=
```
The question should be specific, self-contained, and written in natural language.
The response will contain a direct answer to the question and relevant excerpts and sources from the documentation.
Use this mechanism when the answer is not explicitly present in the current page, you need clarification or additional context, or you want to retrieve related documentation sections.