# Page Structure & Markdown Formatting Guide

## Creating and Editing Pages in GitBook

### How to Edit an Existing Page

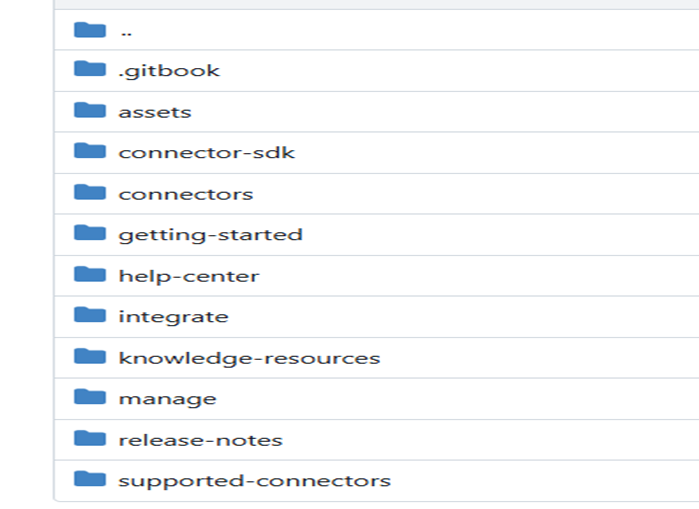
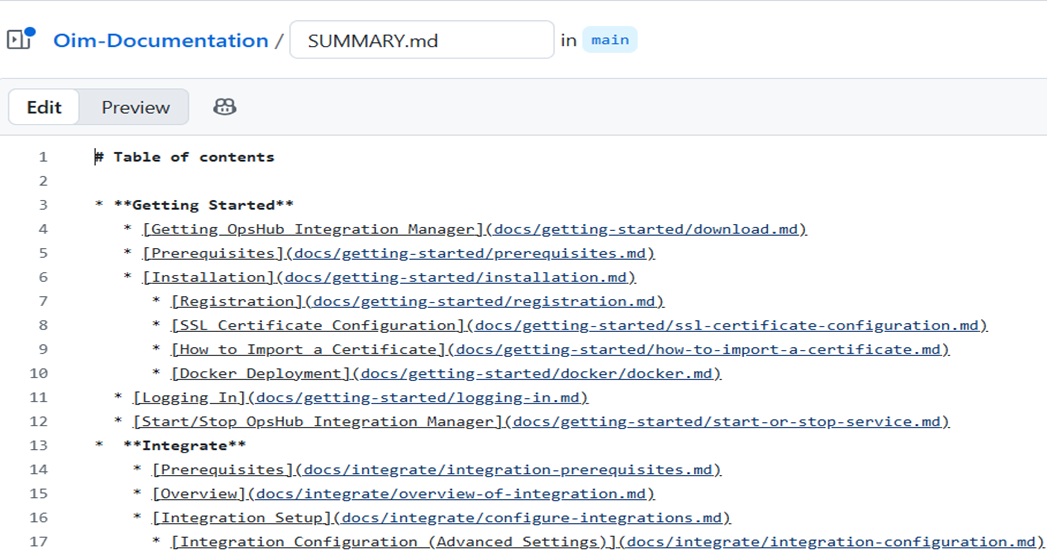
1. Locate the page in the folder hierarchy.

   * Each page in GitBook maps directly to a file in the GitHub repository.

   <div align="center"><img src="https://3947802292-files.gitbook.io/~/files/v0/b/gitbook-x-prod.appspot.com/o/spaces%2FOGKjoRFyp6twVYuUpGPO%2Fuploads%2Fgit-blob-0cf604850c7bfeeac8eb2e90665d74b09bb21909%2Frepo-structure-gitbook.png?alt=media" alt="" width="450"></div>
2. Make required changes (content, formatting, links, images, etc.).
3. Commit the changes.

### When You Add a New Page

{% stepper %}
{% step %}
\### Use the correct file name - Use lowercase letters. - Do not use spaces. - Use dashes (\`-\`) between words. > Example: \`database-configuration.md\`
{% endstep %}

{% step %}
\### Add the page to \`SUMMARY.md\` - GitBook only shows pages listed in \`SUMMARY.md\`. Example: \`\`\`markdown - \[Database Configuration]\(docs/integrate/database-configuration.md) \`\`\`
{% endstep %}

{% step %}

#### Commit both files together

* Make sure that:
  * Your new .md file and the update summary.md file are committed in the same commit.

    <div align="center"><img src="https://3947802292-files.gitbook.io/~/files/v0/b/gitbook-x-prod.appspot.com/o/spaces%2FOGKjoRFyp6twVYuUpGPO%2Fuploads%2Fgit-blob-11f4c8f60e3e02656507be82a92221a8babafaa4%2Fsummary-file.png?alt=media" alt=""></div>

{% endstep %}
{% endstepper %}

\# How to Add a New Connector Entry

To list a new connector in the documentation, follow the steps below. These steps ensure the connector appears correctly in the Connectors list, Supported Connectors table, and the GitBook sidebar.

{% stepper %}
{% step %}
\## Add Connector Documentation Page - Create a new markdown file inside the \`connectors\` folder. > \*\*Example:\*\* connectors/snow-quick-connect.md
{% endstep %}

{% step %}
\## Add Logo in Assets Folder - Place the connector logo in: \`assets/connector/\` directory. - \*\*Logo requirements\*\* - Background color: \`#EDF4FD\` - Background box: \*\*536px × 161px\*\* - Logo size: \*\*72px × 72px\*\* > \*\*Example file:\*\* \`assets/connector/servicenow\.png\`
{% endstep %}

{% step %}
\## Add Entry in \`connectors.md\` - Use the table/card layout format. > \*\*Example:\*\* > \`\`\`html > > **ServiceNow Quick Connect** > ServiceNow Quick Connect > servicenow-quick-connect.md > > \`\`\`
{% endstep %}

{% step %}
\## Add Entry in \`supported-connectors.md\` - Include supported versions and entities in the table format.
{% endstep %}

{% step %}
\## Add Entry in \`SUMMARY.md\` - Include the connector under the Connectors section for sidebar navigation. > \*\*Example:\*\* > \`\`\`markdown > \* \[Connectors]\(connectors/connectors.md) > \* \[ServiceNow Quick Connect]\(docs/connectors/servicenow-quick-connect.md) > \`\`\`
{% endstep %}
{% endstepper %}

\# Markdown Basics - This section provides the essential formatting rules for writing clean, consistent, and well-structured documentation using Markdown. Each topic includes examples, best practices, and recommended usage guidelines to ensure clarity and readability across all content. - For additional reference, you may also review the official formatting guide: \[GitBook Formatting Guide]\(<https://gitbook.com/docs/creating-content/formatting>)

### Headings (Titles and Sections)

* Use the `#` symbol to create headings.
* Each additional # level represents a sub-heading.
* **Example**

  ```markdown
  # H1 – Main Page Heading
  ## H2 – Section Heading
  ### H3 – Subsection Heading
  ```
* **Guidelines**
  * Only H1 and H2 appear in most Table of Contents panels.
  * Do not skip heading levels (use H1 → H2 → H3 in proper order).
  * Keep headings clear and concise.

### Text Styling

| Formatting Type | How to Write It      | Example Output     |
| --------------- | -------------------- | ------------------ |
| **Bold**        | `**Bold text**`      | **Bold text**      |
| *Italic*        | `*Italic text*`      | *Italic text*      |
| Inline Code     | `` `OIM_HOME/bin` `` | `OIM_HOME/bin`     |
| Strikethrough   | `~~Incorrect text~~` | ~~Incorrect text~~ |

### Lists

#### Bullet List

* You can create bullet lists using either \* or -.
* **Example (Using \*)**

  ```markdown
  * First point
  * Second point
  ```

  * **Rendered Output**:

    > * First point
    > * Second point
* **Example (Using -)**

  ```markdown
  - First point
  - Second point
  ```

  * **Rendered Output**:

    > * First point
    > * Second point

#### Numbered List

* Numbered lists use numbers followed by a period:
* **Example**

  ```markdown
  1. Step one
  2. Step two
  3. Step three
  ```
* **Rendered Output**:

> 1. Step one
> 2. Step two
> 3. Step three

### Notes and Warnings

* You can create callout-style messages using blockquotes.
  * **Note Example:**

    ```markdown
    > **Note:** Restart service after configuration. 
    ```

    * **Rendered Output**

      > **Note:** Restart service after configuration.
  * **Warning Example:**

    ```markdown
    > **Warning:** Do not delete this folder. 
    ```

    * **Rendered Output**

      > **Warning:** Do not delete this folder.

### Angle Brackets `<` and `>`

| Purpose            | How to Write It                  | Correct Output |
| ------------------ | -------------------------------- | -------------- |
| Escape `<` and `>` | `&lt;tag&gt;` instead of `<tag>` | `<tag>`        |

### Code Blocks (Multiple Lines)

* Use triple backticks to create multi-line code blocks.
* You can also specify the language to enable syntax highlighting.
* **JSON Example (How to Write It)**

  ````
      ```json
      {
        "name": "OpsHub",
        "version": "1.0"
      }
      ```
  ````

  * **Rendered Output**

    ```json
    {
      "name": "OpsHub",
      "version": "1.0"
    }
    ```
* **XML Example (How to Write It)**

  ````
      ```xml
      <configuration>
        <setting key="timeout">30</setting>
      </configuration>
      ```
  ````

  * **Rendered Output**

    ```xml
    <configuration>
    <setting key="timeout">30</setting>
    </configuration>
    ```
* **Bash Example (How to write It)**

  ````
      ```bash
      echo "Hello, OpsHub"
      ``` 
  ````

  * **Rendered Output**

    ```bash
    echo "Hello, OpsHub"
    ```

## Images

* Store all images inside the `docs/assets` directory.
* Any project should reference images from this central folder.

### Image Reference Syntax

#### Basic Image

* **Syntax:**

  ```markdown
  ![](../assets/image-name.png)
  ```
* **Rendered Output**

  ![](https://3947802292-files.gitbook.io/~/files/v0/b/gitbook-x-prod.appspot.com/o/spaces%2FOGKjoRFyp6twVYuUpGPO%2Fuploads%2Fgit-blob-a5d97ae6aaaa61434b93fb36a7f0b46419789f9d%2Fsample.jpg?alt=media)

#### Centered Image

* **Syntax:**

  ```html
  <p align="center">
  <img src="../assets/image-name.png" width="500">
  </p>
  ```
* **Rendered Output**

  <div align="center"><img src="https://3947802292-files.gitbook.io/~/files/v0/b/gitbook-x-prod.appspot.com/o/spaces%2FOGKjoRFyp6twVYuUpGPO%2Fuploads%2Fgit-blob-a5d97ae6aaaa61434b93fb36a7f0b46419789f9d%2Fsample.jpg?alt=media" alt="" width="400"></div>

### Image Naming Rules

* Avoid spaces in file names.
* Use lowercase for consistency.
* Use dashes (-) or underscores (\_).

### Image Path Guidelines

| Page Location                                     | Correct File Path    | Markdown Example                               |
| ------------------------------------------------- | -------------------- | ---------------------------------------------- |
| integrate/advanced-scenario/source-delete-sync.md | `../../assets/x.png` | `![Source Delete Example](../../assets/x.png)` |
| help-center/error.md                              | `../assets/x.png`    | `![Error Handling](../assets/x.png)`           |

## Embedding Videos

* You can embed videos directly into documentation pages using the `{% embed %}` tag.
* **YouTube Embed Example**

  ```
  {% embed url="https://youtu.be/Po6K9_UXrfM" %}
  ```
* **Video Storage Rules**
  * Video files cannot be uploaded directly into the repository.
  * To include video content, follow these guidelines:
    * Upload all videos to YouTube.
    * Ensure the video is publicly visible.
    * Use the `embed` tag to insert the video link into your documentation pages.

## Reusable Content

* Reusable content allows you to maintain common text (such as repeated instructions or configuration notes) in a single location and include it across multiple pages.
* This helps ensure consistency, easy maintenance, and automatic updates whenever the shared content changes.
* All reusable Markdown files should be stored inside: `.gitbook/includes`.
* **How to Include a Reusable File:**

  * Use the `{% include %}` tag to pull shared content into any page.\
    Example:

  ```
  {% include "../.gitbook/includes/windows-specific-configuration.md" %}
  ```
* **Notes:**
  * Any change in the included file updates all pages automatically.
  * GitBook does not create a TOC (index) for included files.
  * If indexing is required, split content into smaller include files.

## Links

| Type     | Example                                      |
| -------- | -------------------------------------------- |
| Internal | `[Integration Setup](../integrate/setup.md)` |
| External | `[OpsHub Website](https://www.opshub.com)`   |
| Anchor   | `[Go to Configuration](#configuration)`      |

## Tables

### Markdown Table

* Markdown supports simple, clean tables for organizing structured information.
* **Basic Syntax**

  * Use | (pipe characters) to define columns and - (dashes) to separate the header row:

  ```markdown
  | Column 1 | Column 2   | Column 3 |
  |----------|:----------:|---------:|
  | Value 1  | Value 2    | Value 3  |
  ```

  * **Rendered Output**

    | Column 1 | Column 2 | Column 3 |
    | -------- | :------: | -------: |
    | Value 1  |  Value 2 |  Value 3 |
* **Notes:**
  * All rows must have the same number of columns.
  * Alignment is optional and can be added using colons (:).

### Card View HTML Table

* You can use cards to create a visually engaging page layout, combining text, links, and optional images in a clean, grid-based structure.
* **Example:**

  ```html
  <table data-view="cards" data-full-width="false">
    <thead>
      <tr>
        <th align="center" data-card-cover></th>
        <th data-hidden data-card-target data-type="content-ref"></th>
      </tr>
    </thead>
    <tbody>
      <tr>
        <td align="center"><strong>Welcome to OpsHub Guide</strong></td>
        <td><a href="../../README.md">Welcome</a></td>
      </tr>
    </tbody>
  </table>
  ```
* **Rendered Output:**

  <table data-view="cards" data-full-width="false"><thead><tr><th align="center"></th><th data-hidden data-card-target data-type="content-ref"></th></tr></thead><tbody><tr><td align="center"><strong>Welcome to OpsHub Guide</strong></td><td><a href="../readme">readme</a></td></tr></tbody></table>

## Conditional Blocks

* Conditional blocks allow you to show or hide content depending on selected product variables (e.g., OIM vs OM4ADO).

  > **Example:** Show content only when SITENAME = "OpsHub Integration Manager":
  >
  > ```
  > {% if "OpsHub Integration Manager" === space.vars.SITENAME %}
  > ... content
  > {% endif %}
  > ```

### Variable File (`vars.yaml`)

* Variables are defined inside: `.gitbook/vars.yaml`
* These variables allow GitBook to automatically render variable's value across all documentation.

  > **Example** (vars.yaml):
  >
  > ```yaml
  > SITENAME: "OpsHub Integration Manager"
  > ```

### Usage

* To insert the value of a variable inside your documentation:

  > ```html
  > <code class="expression">space.vars.SITENAME</code>
  > ```
* **Rendered Output:**

  > ```
  > This site describes <code class="expression">space.vars.SITENAME</code> features.
  > ```

  (This replaces the variable with its actual value.)


---

# Agent Instructions: Querying This Documentation

If you need additional information that is not directly available in this page, you can query the documentation dynamically by asking a question.

Perform an HTTP GET request on the current page URL with the `ask` query parameter:

```
GET https://docs.opshub.com/v7.220/contributor-guide-index/content-creation-guide.md?ask=<question>
```

The question should be specific, self-contained, and written in natural language.
The response will contain a direct answer to the question and relevant excerpts and sources from the documentation.

Use this mechanism when the answer is not explicitly present in the current page, you need clarification or additional context, or you want to retrieve related documentation sections.
